THIS IS A LISTING OF SMALL WOODEN BOAT BUILDERS PROJECTS.

Anybody can submit any boat at any time for publication. 

The project shall be less than15 feet in length, and must be of wood construction, ply or otherwise.

There will be no advertising, and nothing will be offered for sale.

See submittal  requirements at bottom of page.


 LISTING 

Sorted by Latest Date First

If you have an interest in one of the presented boat articles, and wish to contact the builder,

Email me at  PortableBoatPlans@cox.net  and I will forward your inquiry, for their response. 


AUGUST 20, 2018

JULY 6, 2018

DECEMBER 2017

A Coroplast TENDER, designed and constructed by CLAUDIO, of Gosford, New South Wales, Australia.


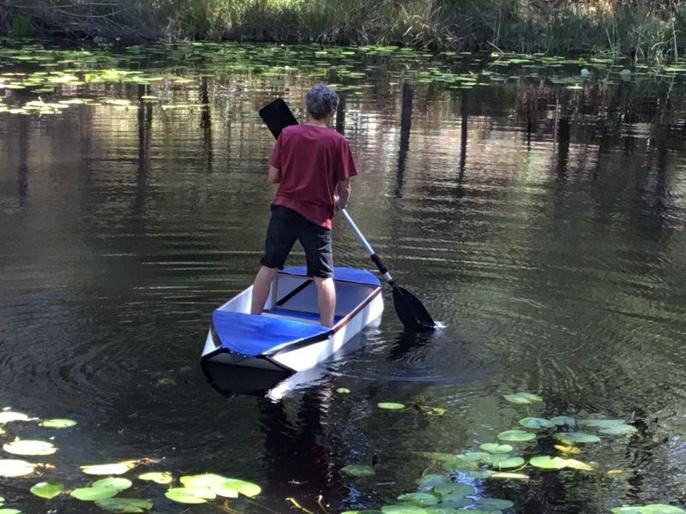
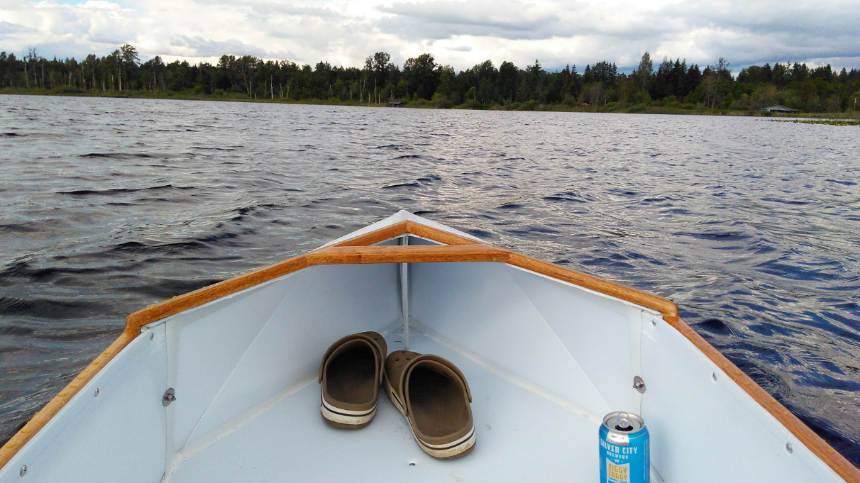
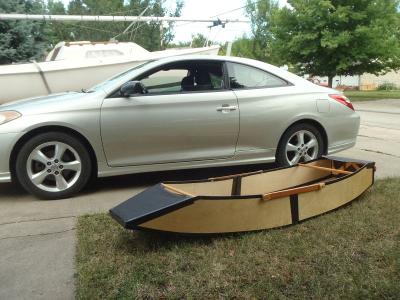
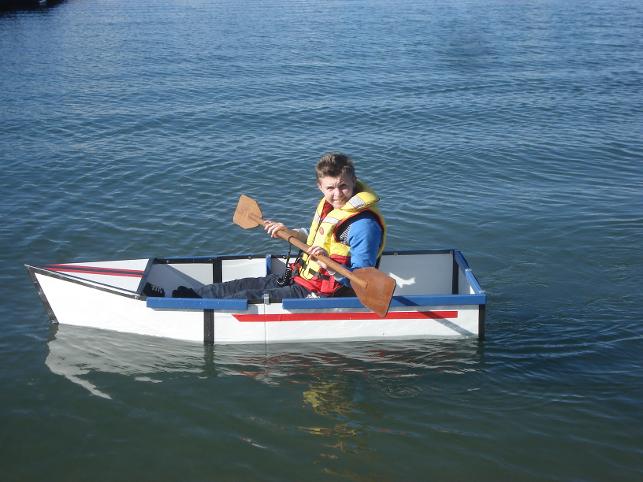
Hi Ken,  just to let you know that I did built my fold up tender, and it works great. I took a lot from your CPB-2016 design,  but also took a lot from this design too: 

           https://www.youtube.com/watch?v=caBSze3Im6c

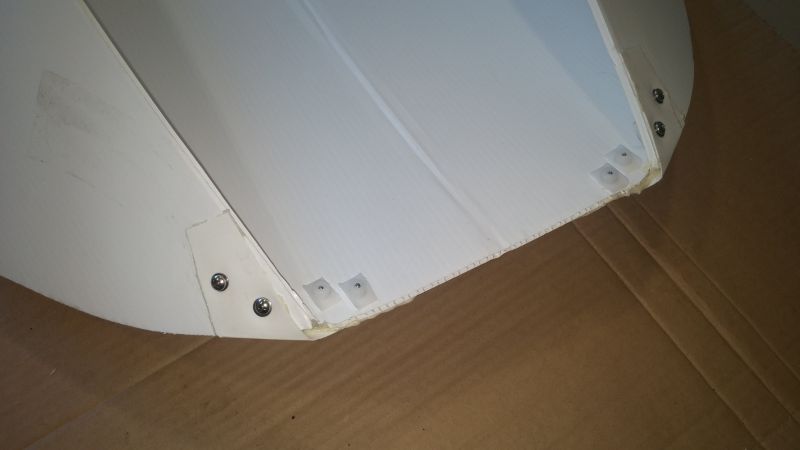
I used 4mm Fluted Sheet which proved hard to work with, because I wanted a curved bow.  4mm Sheet is hard to curve-bend and I needed additional plastic bracket supports to hold the Bow and Stern Curves up when the boat is unfolded. I made the brackets from a sheet of 0.5mm plastic, and I used glue and stainless screws and nylon clips. This takes a lot of  the stress, because there is no way the tape could hold the curve when using 4mm Coroplast,  ... see here....


And here ...


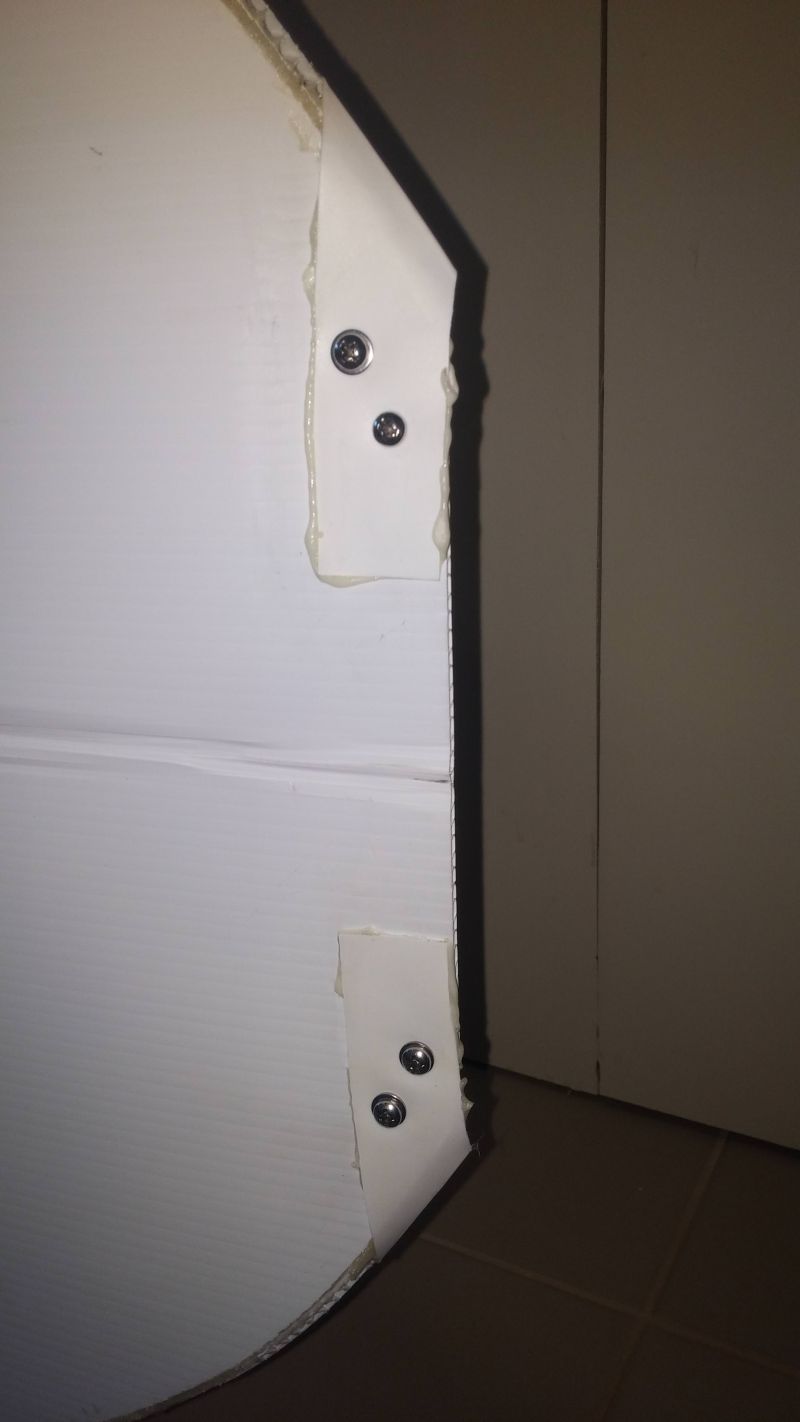
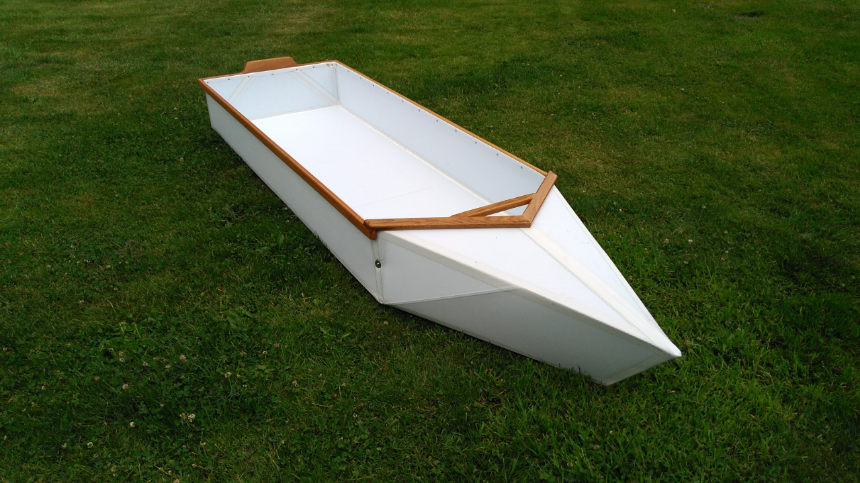
I made wooden full frames with Stainless Steel corner brackets as they optimize space, but are not as quick as your design to set up. They are held down with Heavy Duty Velcro and I use 8mm nylon bolts through the sides to hold the frames up. The bolt holes are reinforced with large washers which I glued on the Coroplast sheet.  

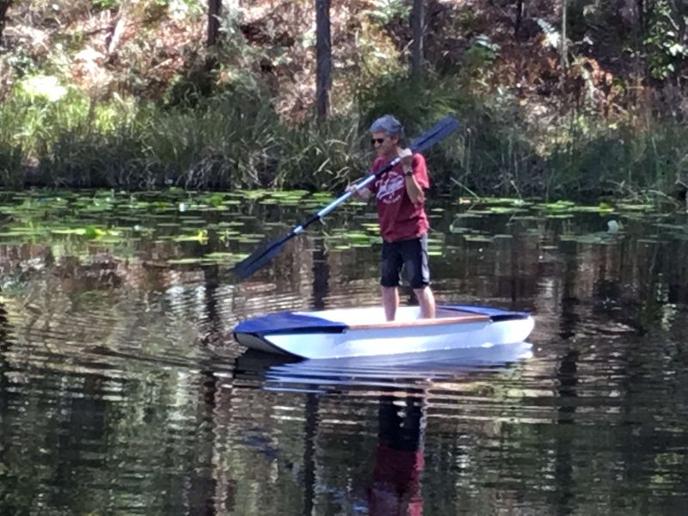
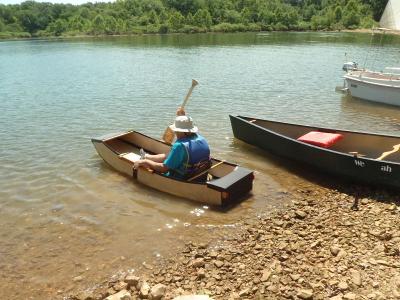
1st Test on my Dame.

I am standing in these photos, but not for long, and I have not tested that in the lake yet. A lot of paddle drips make it into the boat when using it as a SUP.... So not so keen 
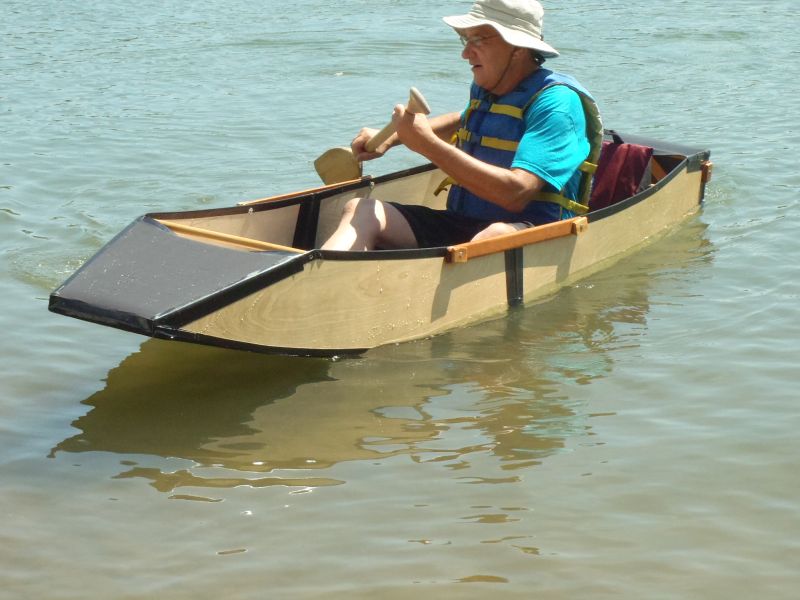
on this now. Kneeling gave me the best stability and a simple bit of high density foam made that comfortable too.


FRONT
BACK

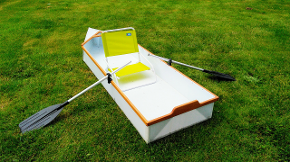
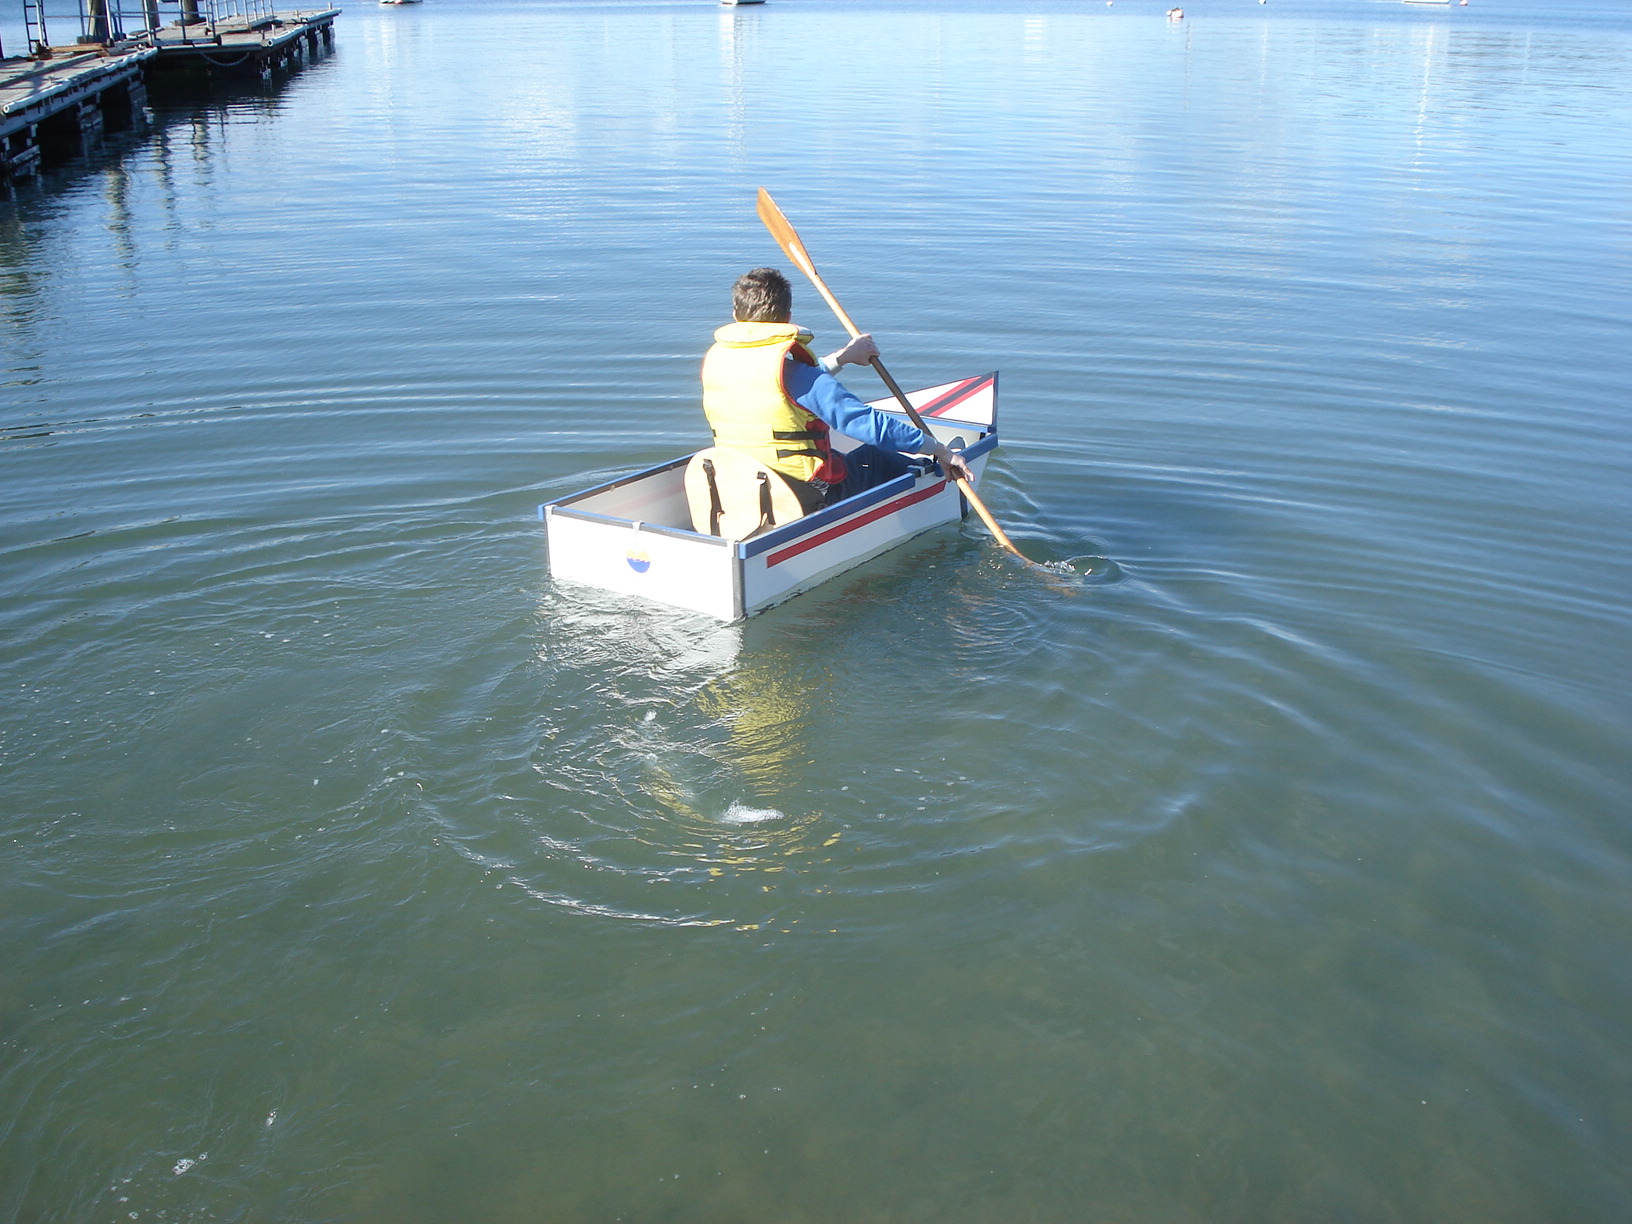
I fitted shoulder straps to the boat and floor board (Marine Ply) which allows me to carry everything from car to the water in one (walking) trip.  

Below is the boat stored on my small Yacht..... It's minimal footprint is amazing!


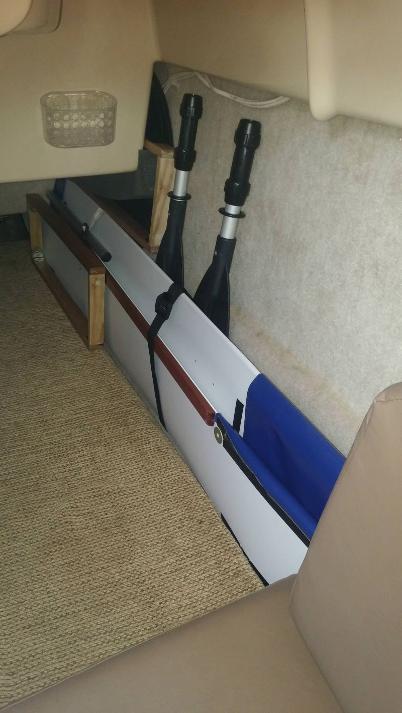
The above photo shows the sides supports which are made from two lengths of hardwood moulding. I screwed these on with 5 screws each side. I used short Stainless Steel round head screws but I would recommend countersunk heads as they spread the load on the Coroplast and end up nice and flush.


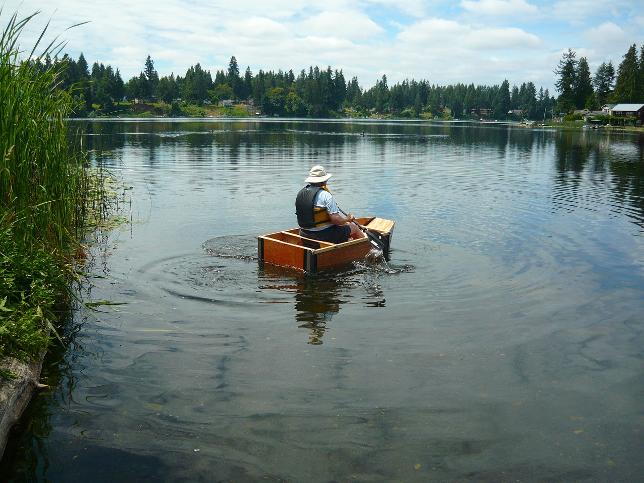
A couple of videos, the Real Test... My Yacht Moored on the Lake ...

https://www.youtube.com/watch?v=Z9QhtjMGa2M&t=2s

And Assembly ...

https://www.youtube.com/watch?v=HekjbxSmCI0&t=7s


You might notice that I've glued two reinforcement sheets on the underside of the hull.... I'm also hoping to make these fold-down fins too. But that idea is currently a work in progress.

One last note.... I did not have much success using fine sand paper on the Coroplast sheet before Taping, to remove any contaminates .... In my case tape adhesion was definitely reduced on the two surfaces I did that on.


Thanks for the help you gave me ... I'm so happy with the end result ;-)

All the best.

            Claudio


JULY 2017

Max Size Coroplast Cruiser by BRIAN SCHIMPF, of Stevens, Washington.


A few months ago Brian contacted me, asking a few questions regarding the capacity of my Coroplast boat designs. I tend to be over cautious when specifying maximum weight capacity, and being a big guy, Brian was justifiably concerned. The end result of the conversations was that the existing plans were best suited for builders who were under 220 pounds, and he did not quite comply with that requirement. However, this was not the end of the conversation. 
Determined to build a Coroplast hull, Brian knew that a larger than 4'x8' sheet could make a difference. I had told him that 5'x10' sheets are manufactured, but they must be special ordered, and in multiple quantities. Most people give up at that stage, not Brian. He persevered, and was able to secure the larger sheet, and then began the job of scaling up the design to suite his needs. In the process, he developed new methods of assembly, and of strengthening the floor area. After all, this hull is 25% larger than the standard version, and needed additional support. He used a second sheet of Coroplast, laid perpendicular inside the hull bottom, for stand-up capability. He also made it into a non-folding design, which enabled him to add structural wood framing, that enhances the stiffness, as well as the aesthetics of the boat. 
The attached pictures should give you a good impression of his hard work, and the very positive end results. He even gave it a name, "The Swamp Thing", which indicates the type of area that he sometimes ventures into. His words, "I went to the swamp this afternoon. It is a bit brutal, with deadheads, logs, stiff brush, etc. This boat seems more robust than I had imagined. Rowing is definitely the way to go. Amazing !  The boat sure drew a lot of attention and questions.  I do feel that I should have a longer kayak paddle, and I plan on putting oarlocks on it. Also shopping for a tiny gas trolling motor. Regardless, it's even more stable than I imagined. Seems very safe. I even caught a few fish ".

He says it draws a lot of attention, and I can believe it.  Nice job Brian.


This picture shows the clean lines of the hull, and great craftsmanship.

Brian displaying the light weight of the finished hull. PS: His dogs go along for the ride !

An on the water pictures always helps define the finished project.

Finally, the decal that best describes the boat's existence.  Note too the fine carpentry work.

Thanks Brian for such a great example of an original Coroplast project.

FEBRUARY 2017

JUSTIN JEFFERYS version of the CORO-BOAT

Back in early January, Justin wrote to say the Core Flute boat they built won 1st Prize in the SYRRA Recycled Raft Race. 
 I needed to know more about this, and asked for some details of the event. It turned out to be more than expected.

Surprise, this is the picture that says it all. These two boys, Jaxon Jefferys on the right, and Thomas Knight on the left, are responsible for the win. The actual contest, which took place near Perth Australia, was to build a small boat totally out of recyclable materials, sponsored by the South Yunderup Ratepayers & Residents AssociationThe SYRRA Recycled Raft Race is an annual event. The emphasis is on family fun and fostering community spirit, there are races for everyone from 10 years of age and up.  

"As you can see, both boys took an active part in the construction.  It does have recycled demolition timber content and involved both boys in the set out, drilling of the holes for the cord and then lashing the old oil containers (flotation) to the boat was fun for all. Tom had never used a drill and was rather nervous about messing up the job. I started the hole and stood back only advising verbal on drill positioning. Tom was very happy with the results."

"We live about an hour and a quarter south of Perth Western Australia. South Yunderup is the oldest canal system in Western Australia, but its history goes back originally to fishing, big canneries, as well as farming and a mill (1840) on one of the islands in the estuary. The original mill was sail powered."

"The race is between two canals. The rules are: cross the canal, grab an Australian flag from a bucket, return to the other side, deposit flag in bucket. All under human power with as much recycled content as possible and in the most creative manner.  As you can see it's a sea voyage akin to the 'Sydney to Hobart' races." 

With winning number one fingers raised, Jaxon and Thomas were obviously thrilled and proud to have won this year's recycled content boat contest. But, just wait until next year !

JANUARY  2017

GORDON SCHMIDT builds the CORO-CANOE

In the photos below, it will be made abundantly clear that Gordon has taken ease of assembly to the next level. Using the CPB-Canoe plans as a guide, he has combined the 5 basic elements of the build into just two, the hull and the internal supports with integral seat. His Grandson, Cameron, is the recipient of this forward thinking build. 

This is the combined plywood inner base, side supports, lateral cross beams and integral seat.

The completed assembly. Coroplast hull with custom gunwale guards, and tough taped seams.

Detail of the hinged side supports to the ply base panel.

Cameron performing initial water testing.


Thanks for a terrific design.  Following are some pictures and comments relative to the example that my grandson and I cobbled together over the Christmas Holidays.  I did make some changes  . . . . 
1. For the gunwales, I used the plastic channel strips that Home Depot and Lowes sell for use with plastic garden lattice.
2. I made the floor, seat, front bulkheads,  and thwarts as one assembly.  The assembly folds flat for transport/storage. 
3. The combination of the "channel style gunwales and the seat assembly, which bolts the thwart to the gunwales, seems to result in a fairly rigid assembly (no flexing in my brief tour of the swimming pool.). I do not think it requires anything to keep it "located"
4. I have to admit that the boat has not been folded yet, but it is accumulating hours in the pool and may be worn out before folding is an option.


Things for others to think about : 
A. Practice folding Origami before trying one of the coroplast boats.
B. As noted in the plans (and ignored by me), try a simpler coroplast boat first.
C. Lay-out accuracy will provide dividends; take your time.  My build was executed by a 12 year old and someone acting like 12 year old.
C. My next build will employ shears or good quality tin snips. Box knives and individuals performing at the level of 6th graders is not conducive to accuracy, but dang it was fun.
D. Applying the tape is another area that would benefit from care/precision rather than seeing who can get the most tape on the other guy.
E. I was a bit perplexed by how to fold the bow and stern but, similar to smart phones and TVs, having a young person to point out the obvious helped.
F. Serious endeavors benefit from care and focus.  Our focus was to have fun and we achieved that without any leaks.

I think that total time to collect material and build was about 20 hours and costs were well below $100.  There are things I would do different next time but I don't think I could recapture the fun and satisfaction I got out of this build.  

Gordon Schmidt

Texas, USA

ROBERT VALLI, a Solar Powered Original Design

This design, of Aluminum Composite and PVC Pipe geodesic construction, has evolved into a unique and wonderful little boat. The fact that it is populated with solar panels is icing on the cake. Robert has employed his engineering skills, and developed a finely tuned, easy to manage, single occupant boat that should appeal to many people. Take a look !

A good view of the solar panel array.

Right at home with the big boys.

And yes, it fits in his truck. A true portable.
Simple sleek lines, comfortable seating, water friendly !

Robert is working to make his design plans available via a new website. I will make you aware of when and where as soon as the sea trials, and any modifications, are completed. If you have any interest, just let me know and I will pass it on.

NOVEMBER 2016

TICE PORTERFIELD and Family, of Bertram Texas, build the QUAD

Some people dream big, and others take smaller steps, but also accomplish a lot. Tice seems like the guy who does both. 
A few months ago he inquired as to which of my boats would be best suited for a large family. Rarely are those two elements used in one sentence. But he settled on the Quad, for good reason. It has good capacity, and can be paddled easily, or motor powered, and it still fits in a truck. The following pictures are of the completed boat, mostly taken in late afternoon, and show some of his brood enjoying the adventure.

The photo on the left is of the Quad neatly nested and parked on the tailgate of his truck. At the right are a couple of his children anxiously holding on to the boat for it's first outing. Note that all four modules are assembled, which makes this a canoe that can accommodate a small family. 

Another picture is of his daughter venturing out on her own. Eventually everyone participated in the launch, and note the PFD,s all are wearing. Not content with just one successful project, Tice is in the process of completing a 1 Sheet Wedge.

September 2016

STEVE HILBERG and grandson JORDEN build the River Rover

A few months back, Steve Hilberg wrote and inquired about the plans for the River Rover, one of my newer designs. He was unsure if it would satisfy the needs of he and his grandson Jorden, both avid fishermen. This would also be the first boat building experience for Jorden, and Steve wanted it to be a good one.  Well, those few months have elapsed, and the following photo montage is clear evidence of their partnership in the boat building process.

Initially Steve wrote:  “I chose this design because we have a small pond on the property next door, and both my grandson and I like to fish. I was intrigued when I came across the plans on your website. The whole idea of a "portable" boat appealed to me. Here was a boat I could build with him that was relatively inexpensive. I do a lot of woodworking so I wasn't intimidated by the project and there was plenty he could help with.”


I purchased 3 sheets of 1/4" ACX plywood and 4-5 1x8" boards. I ripped these down to 1x2 and 1x1 on my table saw as I needed them. We followed the excellent instructions that accompanied the plan. I wanted to involve my grandson Jorden as much as possible (he is almost 7), so he helped me measure and mark parts to start with. Obviously for safety reasons I did all the sawing. When it came time to glue up parts he helped spread the glue, and held things together until I could clamp them. There was some tedious measuring/cutting/fitting/adjusting work (the interior chines especially) that I took care of myself. His attention span sometime lagged, so we set a reachable point each day and then quit to do something else. This actually worked out well since the glue-ups had to dry.  It was also a hot and humid summer so we tried to keep the work periods in the garage reasonable.


Jorden wanted a blue and black boat (not quite sure what he was envisioning), and we settled on blue with a black "racing stripe". I did a lot of research on what might be the best coating, and based on experiences of other boat builders I found, I settled on a quality exterior house paint. We went to the store and Jorden picked out the color blue he wanted. The boat was primed, painted, and three days later we took it on its maiden voyage. (I wanted to leave it cure longer, but he was headed home in a few days). I made two quick plywood seats out of leftover material and it was ready to go. I was pleasantly surprised how stable it was. We decided the our 5 minute ride was enough of a test and headed back in to get our fishing gear.


One other thing I added was two handles to the stern section and one on the bow section to help pull the boat in and out of the water. We really enjoyed building the River Rover.  I would like to try another one sometime, but we don't need a third boat!  
July 2016

JONAS ANDERSSON of SWEDEN


This is a 1 SHEET WEDGE constructed by Jonas. After having built a larger more traditional style boat, he realized he needed something smaller, and easier to transport. He chose this design for it simplicity and low cost.


Jonas's selection of a very comfortable folding seat is just what the 1 SHEET WEDGE needs. He also utilized the rope steering method, to easily control the boat's forward direction. And notice some little finishing touches he made, like the corner braces, to further make the hull more rigid and comfortable. Nice job Jonas !
JULY 2016

FRANK BAEDKE'S KWIKY

All assembled, after transport in the car.
Loading the seat and provisions.

KWIKY built by Frank Baedke of Iowa. Splashed at a messabout at Stockton Lake in SW Missouri, July 9, 2016.

Initial entry into the water ?
Looks like Frank is enjoying himself !

"We had 17 boats there. Got kinda hot and winds were quite soft. Made for a memorable day on the water."

JUNE 2016

TOM HRUBY'S ORIGINAL


This is an original design by Tom, patterned after some of my coroplast folding hulls, but with a twist.  


As you can see, he has taken the Tough Tape idea and aptly applied it to plywood panels, creating a punt style hull that is roomy, solid and stiff, and folds flat for transport and storage. This was a first for Tom, and I am sure we will see more of his handy work in the months ahead. 
JUNE 2016
GREG BOWLES BIG F.I.T.


Greg, from Ontario Canada, built his F.I.T. for fishing, and it is outfitted with all the gear to make it successful. Over the past few weeks he writes, " I've taken it up north twice this spring and both times came home with lake trout. Now I'm not saying it was because of the boat that I caught the trout, but it sure made it comfortable and fun. Best part was that after 5 days camping/fishing and being quite tired, the FIT comes apart quickly, and as it is so light it just slips in to my F150 easy as pie."  A great recommendation, thank you Greg.

MAY 2016
RICHARD BYROD'S F.I.T.

The photo of Richard on the lake was taken on a real windy day, and he certainly got his required exercise. The lower photos are of the finished boat, and show exactly how the nesting hull process makes a long boat very portable.
Like all builders, Richard could not resist putting the hull modules together before they were finished. I do the same thing.  It's an exercise in determining if it will really fit in the vehicle.  Nice job, Mr. Byrod !

September 2015 

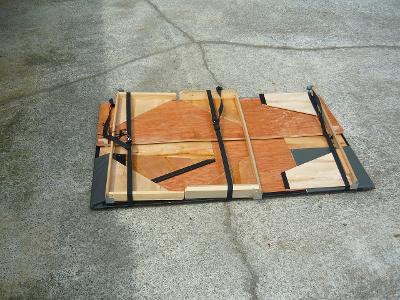
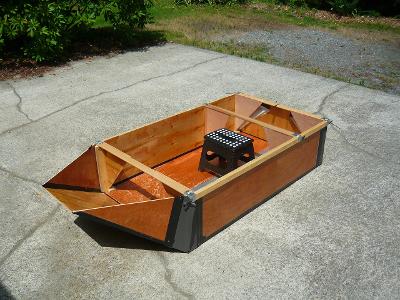
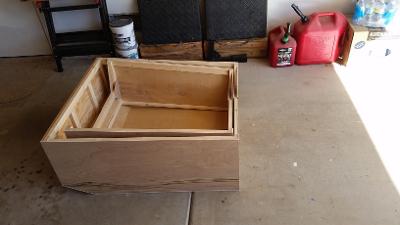
JIM HENLEY'S POLLYWOG 


Click on a picture above to expand to full size. 
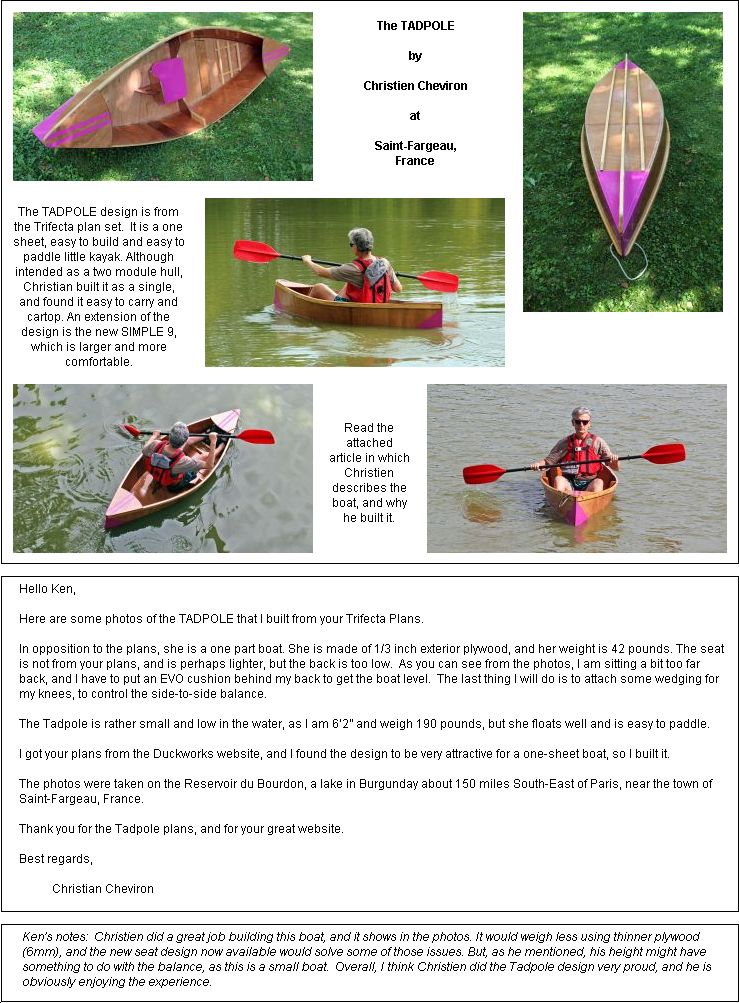
Hi Ken,

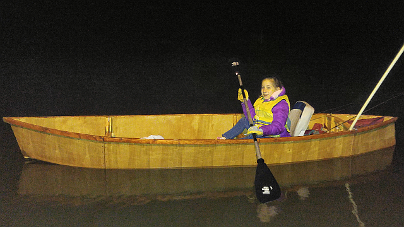
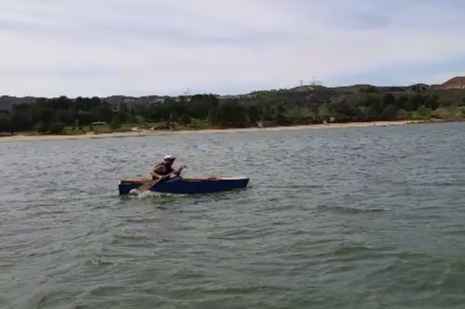
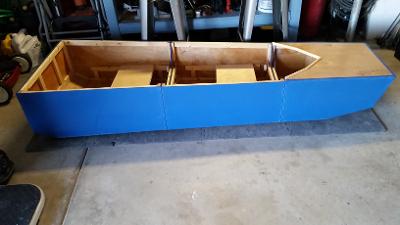
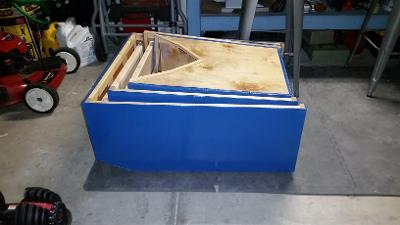
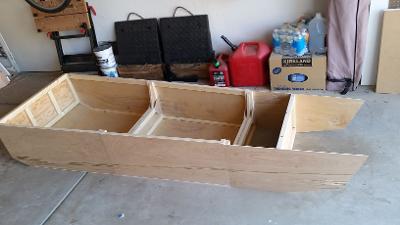
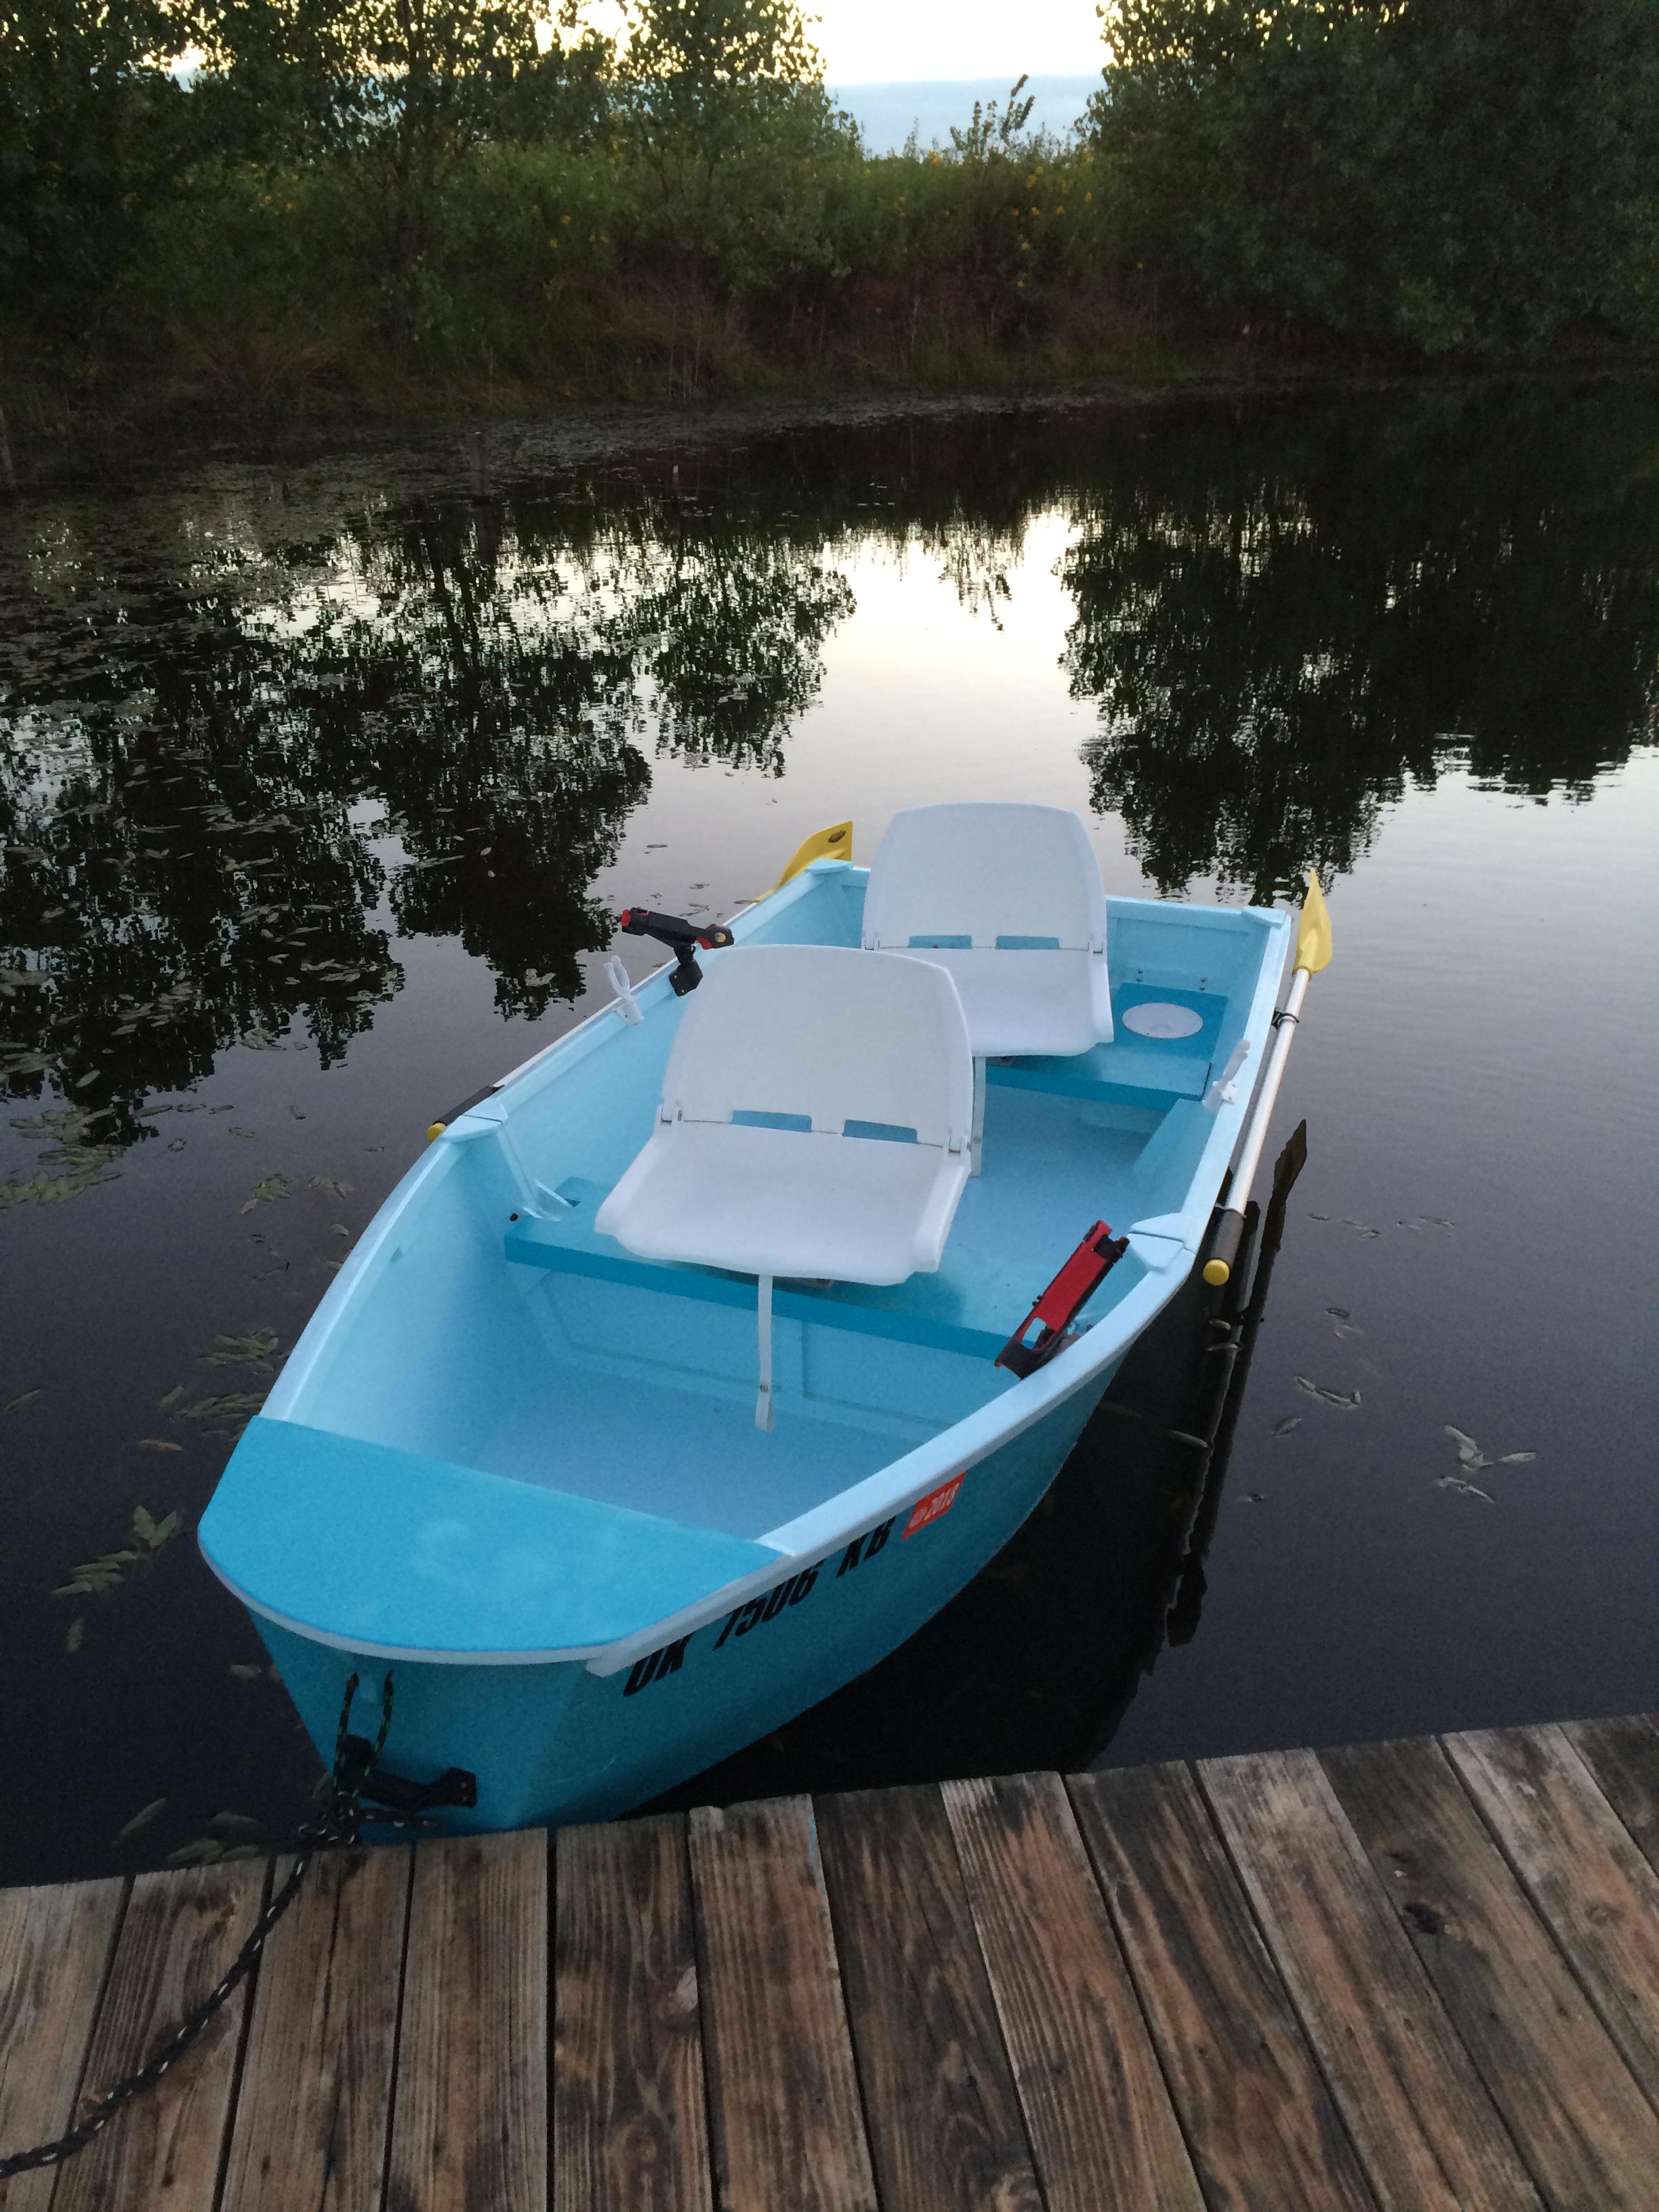
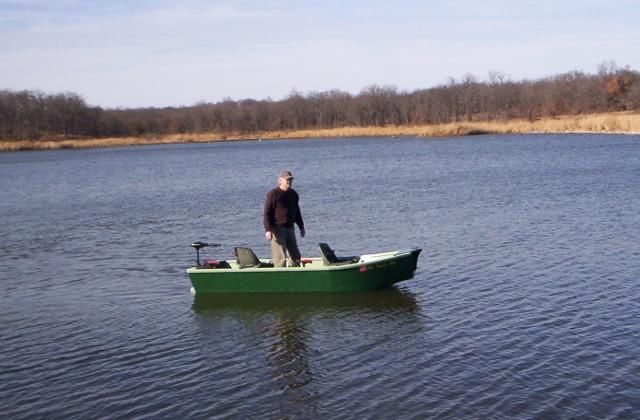
You asked me to let you see the finished product.  We just took it for its maiden voyage on our pond behind the house this evening. The build went well and turned out better than expected.  Since my wife Mollye helped in the construction we call it the Mollyewog!  We are planning to take it to the lake camping next week . Thanks for a great set of plans.

Jim Henley

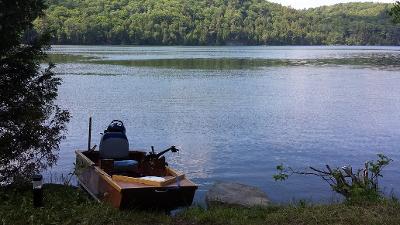
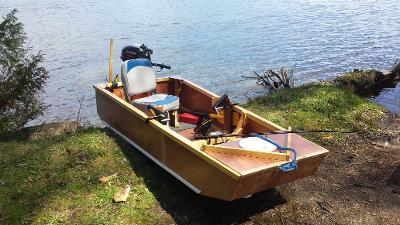
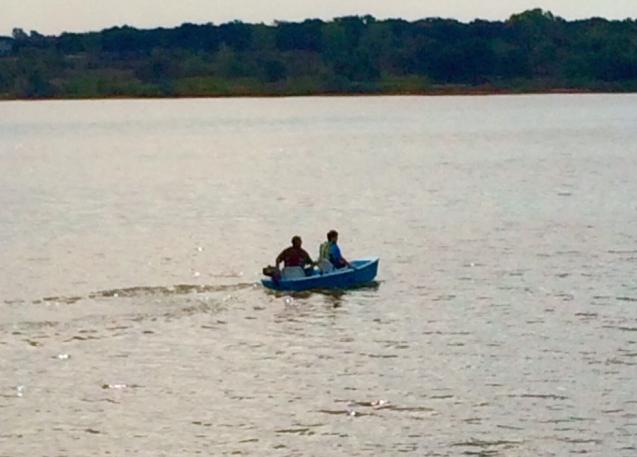
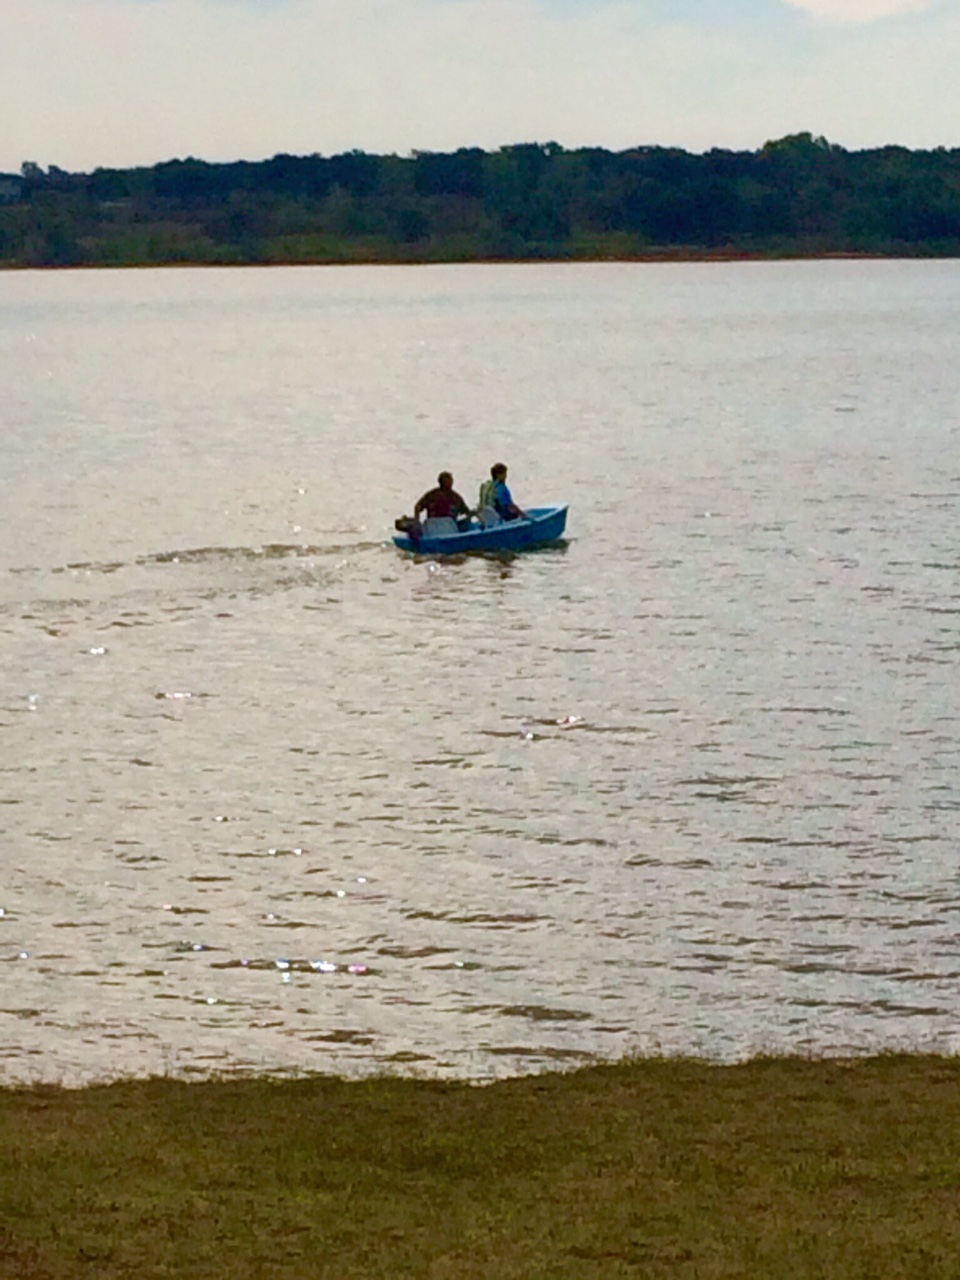
Follow up : Thought you might like to see a picture of it under power with a 2.5 hp motor on Arcadia Lake.  It performed well under power (last photo above). 

Jim

This boat project was a first for Jim and his wife Mollye, and they did a great job of bringing the Pollywog to life. Thanks for your fine attention to detail, and happy boating ! 

Ken

 APRIL 2015

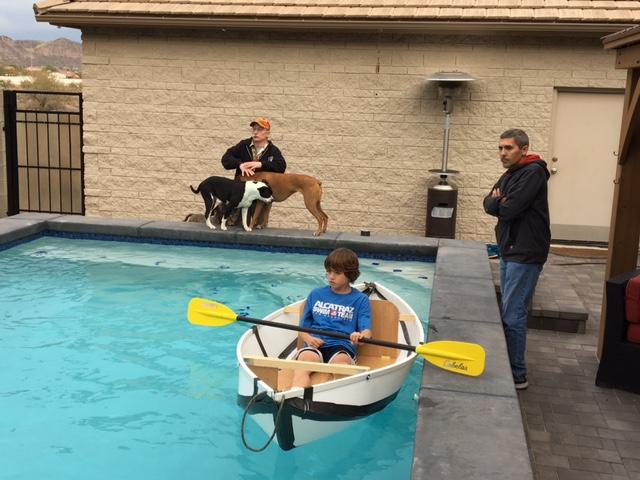
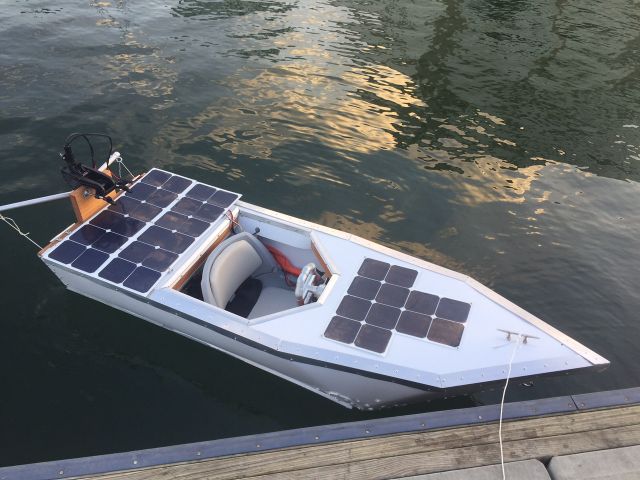
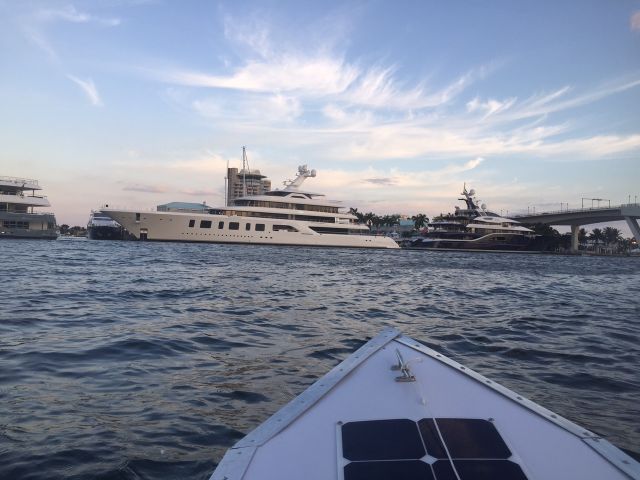
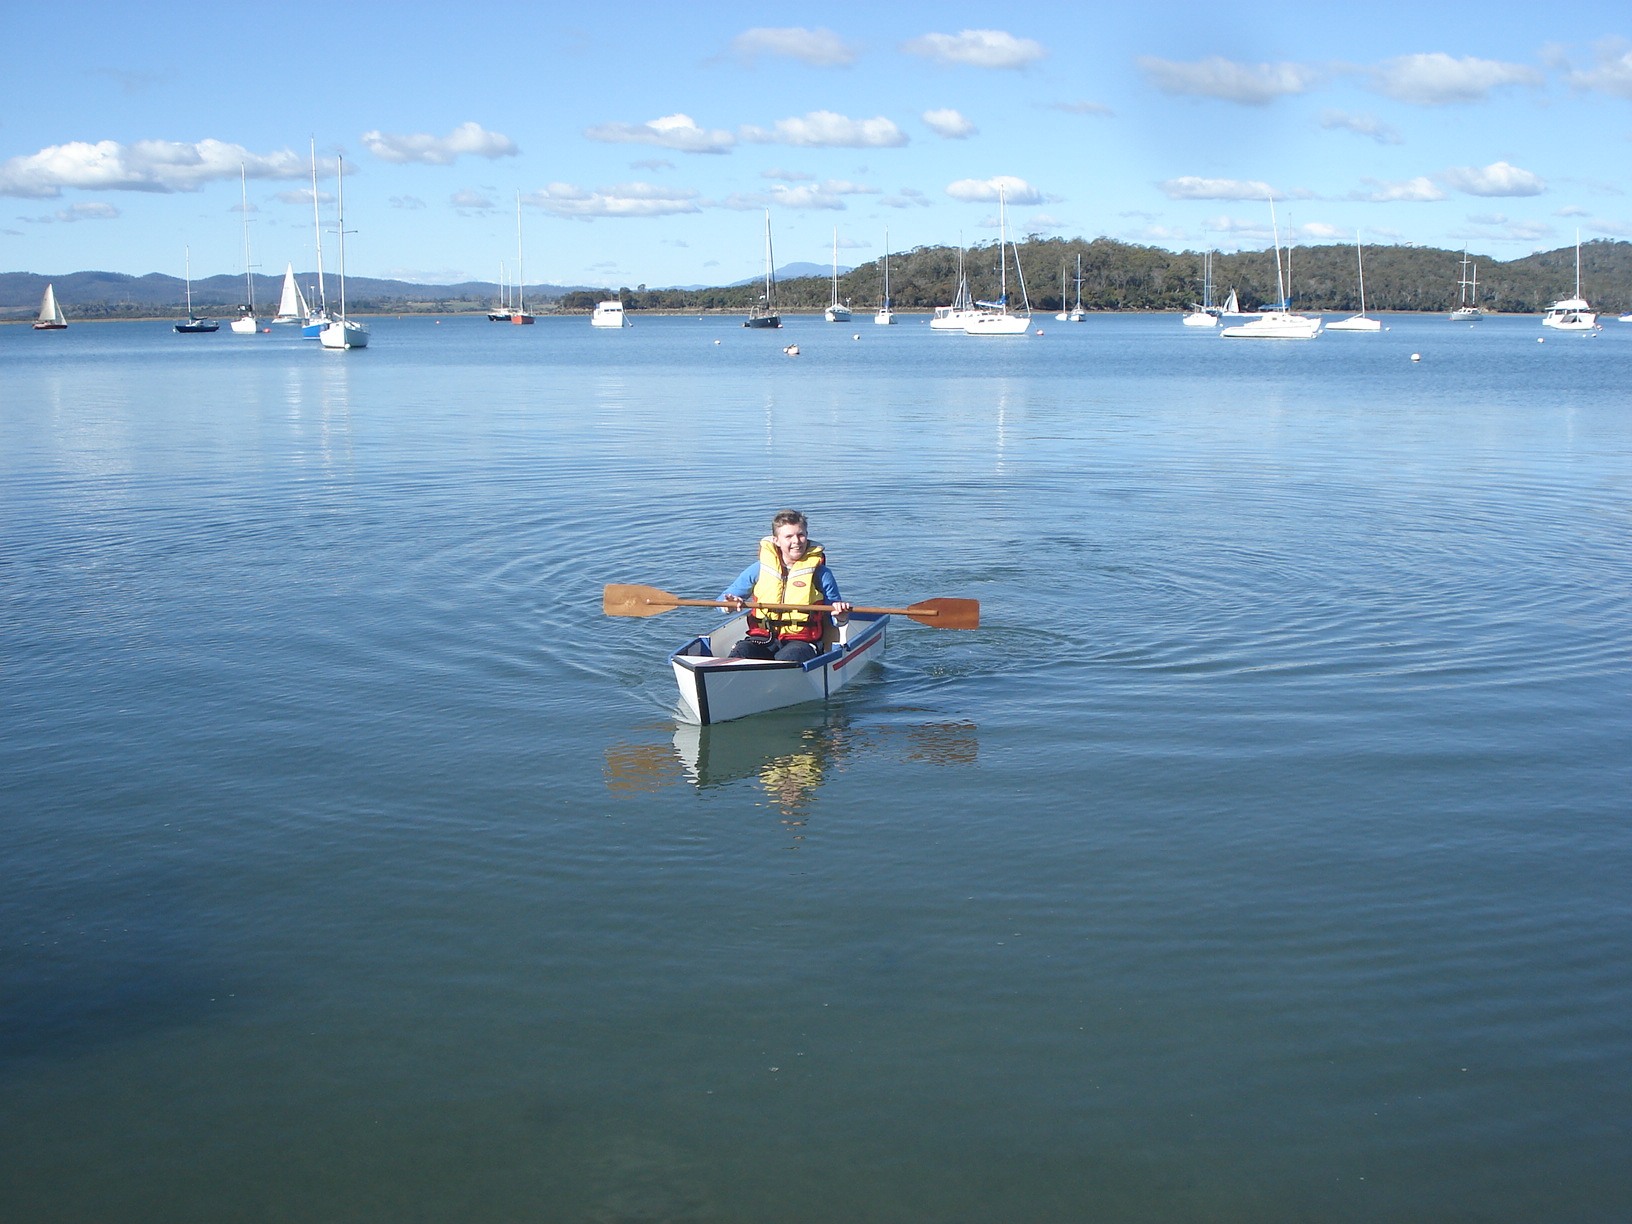
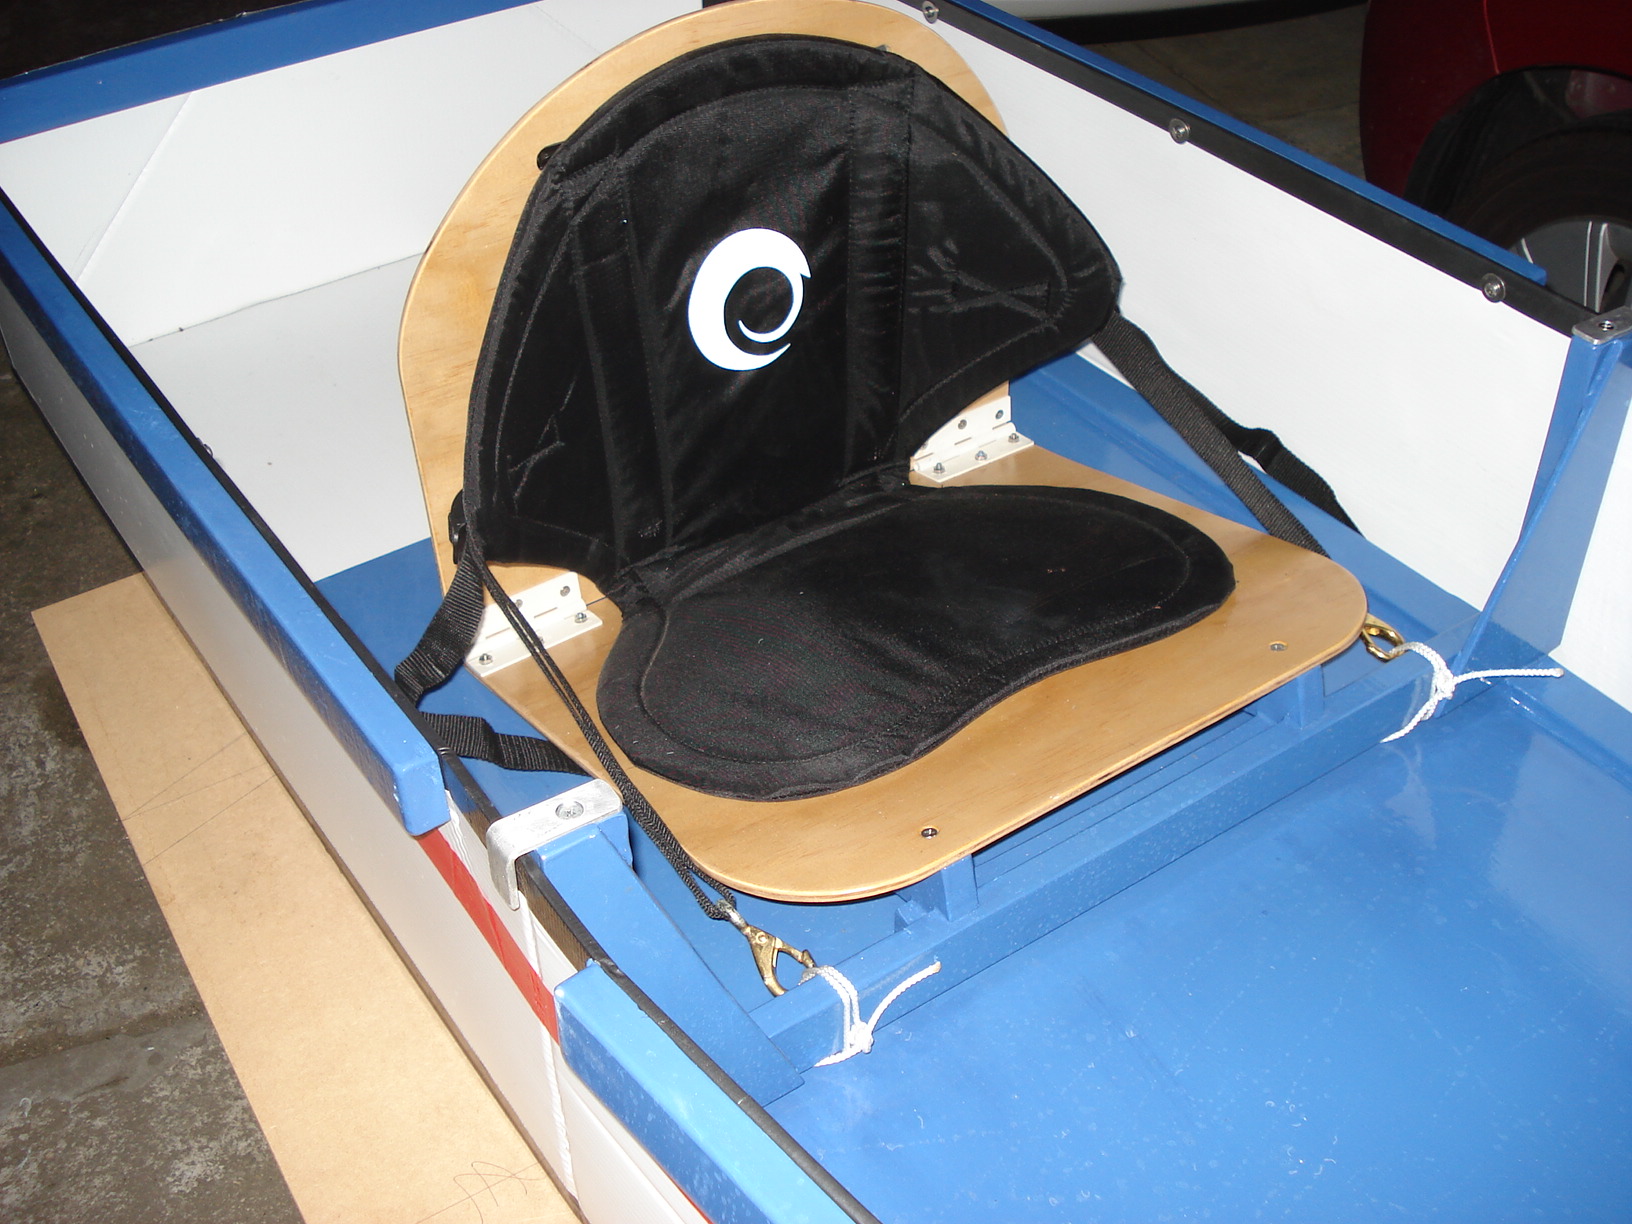
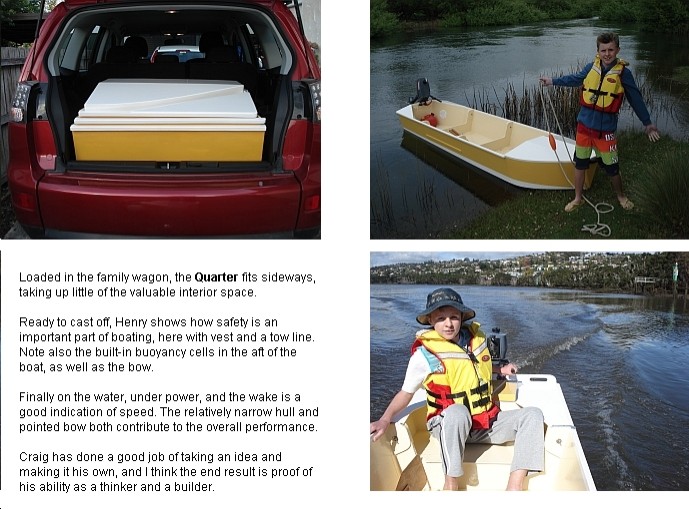
 HENRY TITMUS and his CORO POWER BOAT


 Click on the above photos to enlarge.

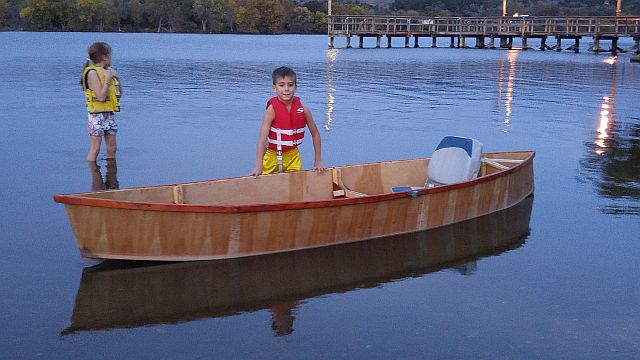
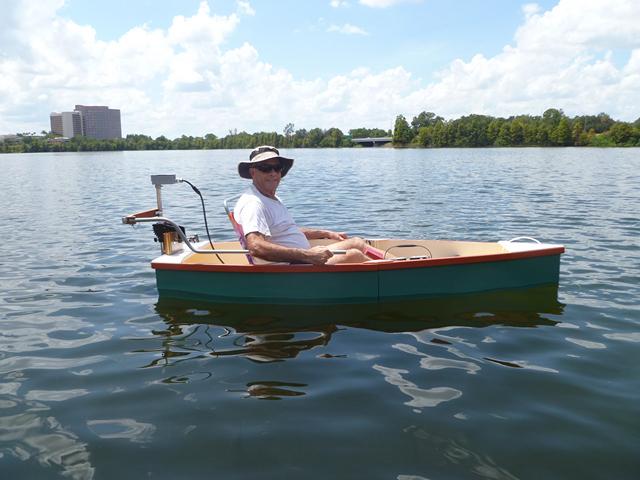
One of the youngest builder/contributors, only 17 years old, is Henry Titmus of Tasmania, Australia. With the help of his dad Craig, he is the happy owner of the pictured Coro Power Boat. Because it is made of Coroplast material, the boat is lightweight, yet strong and safe for young people like him. Note the custom seat and paint job, part of his detail modification. Henry is obviously enjoying each moment with his new boat, and says Ken’s design is 100%!

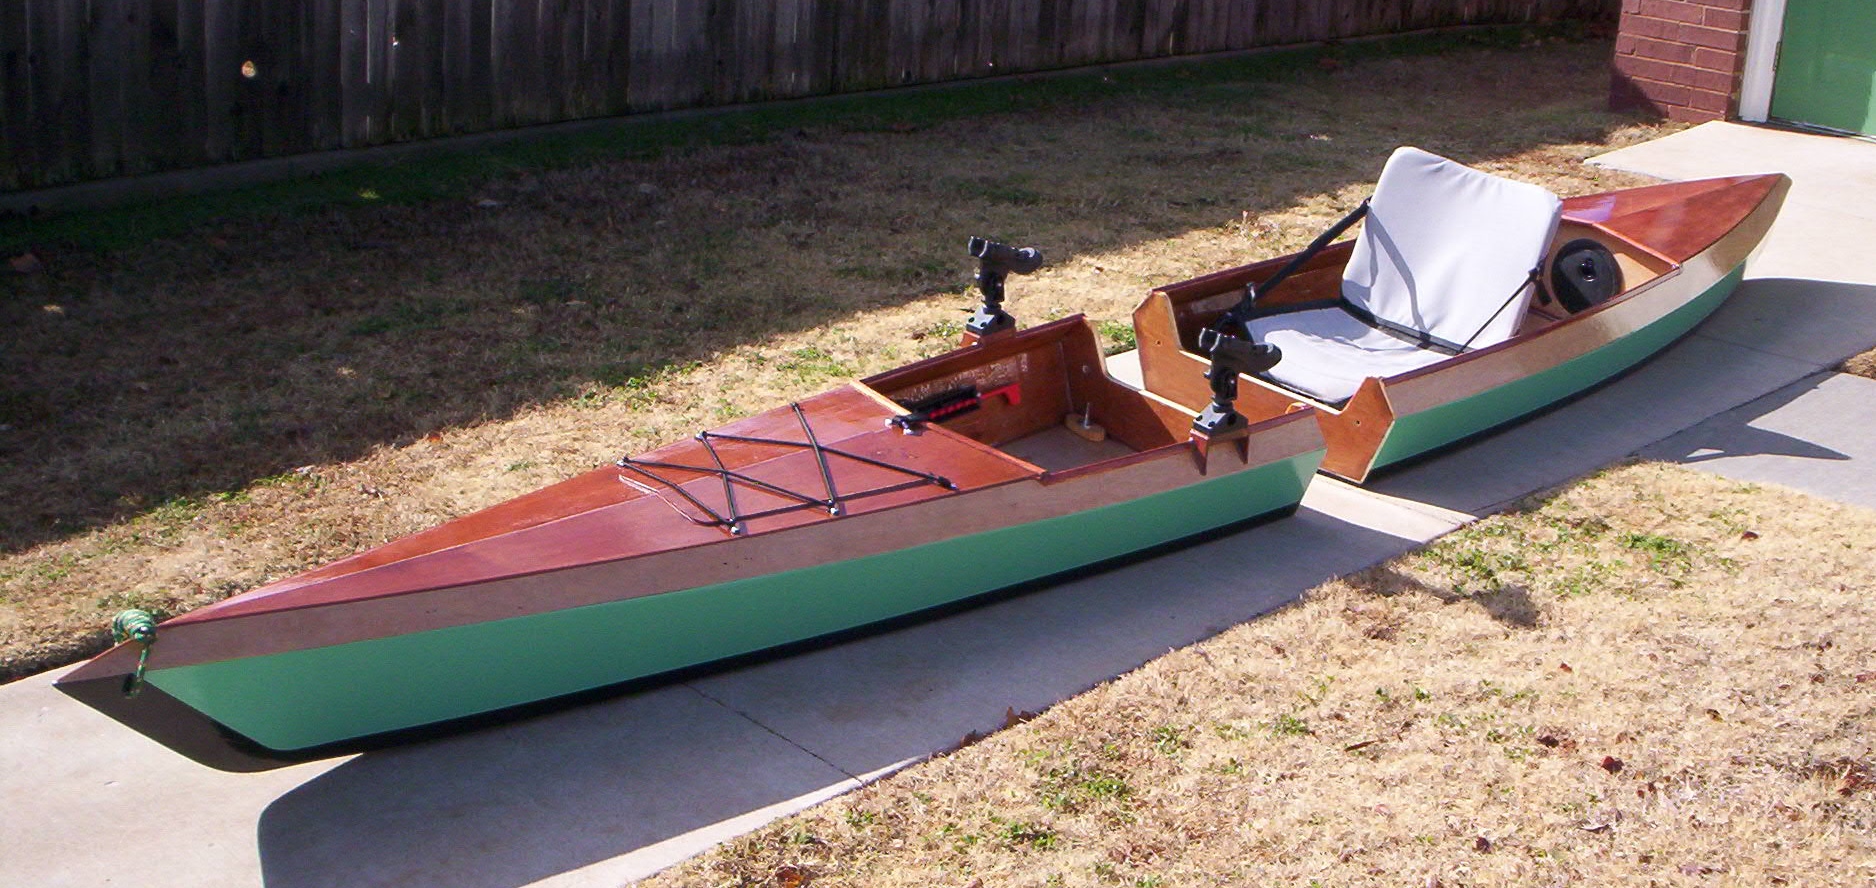
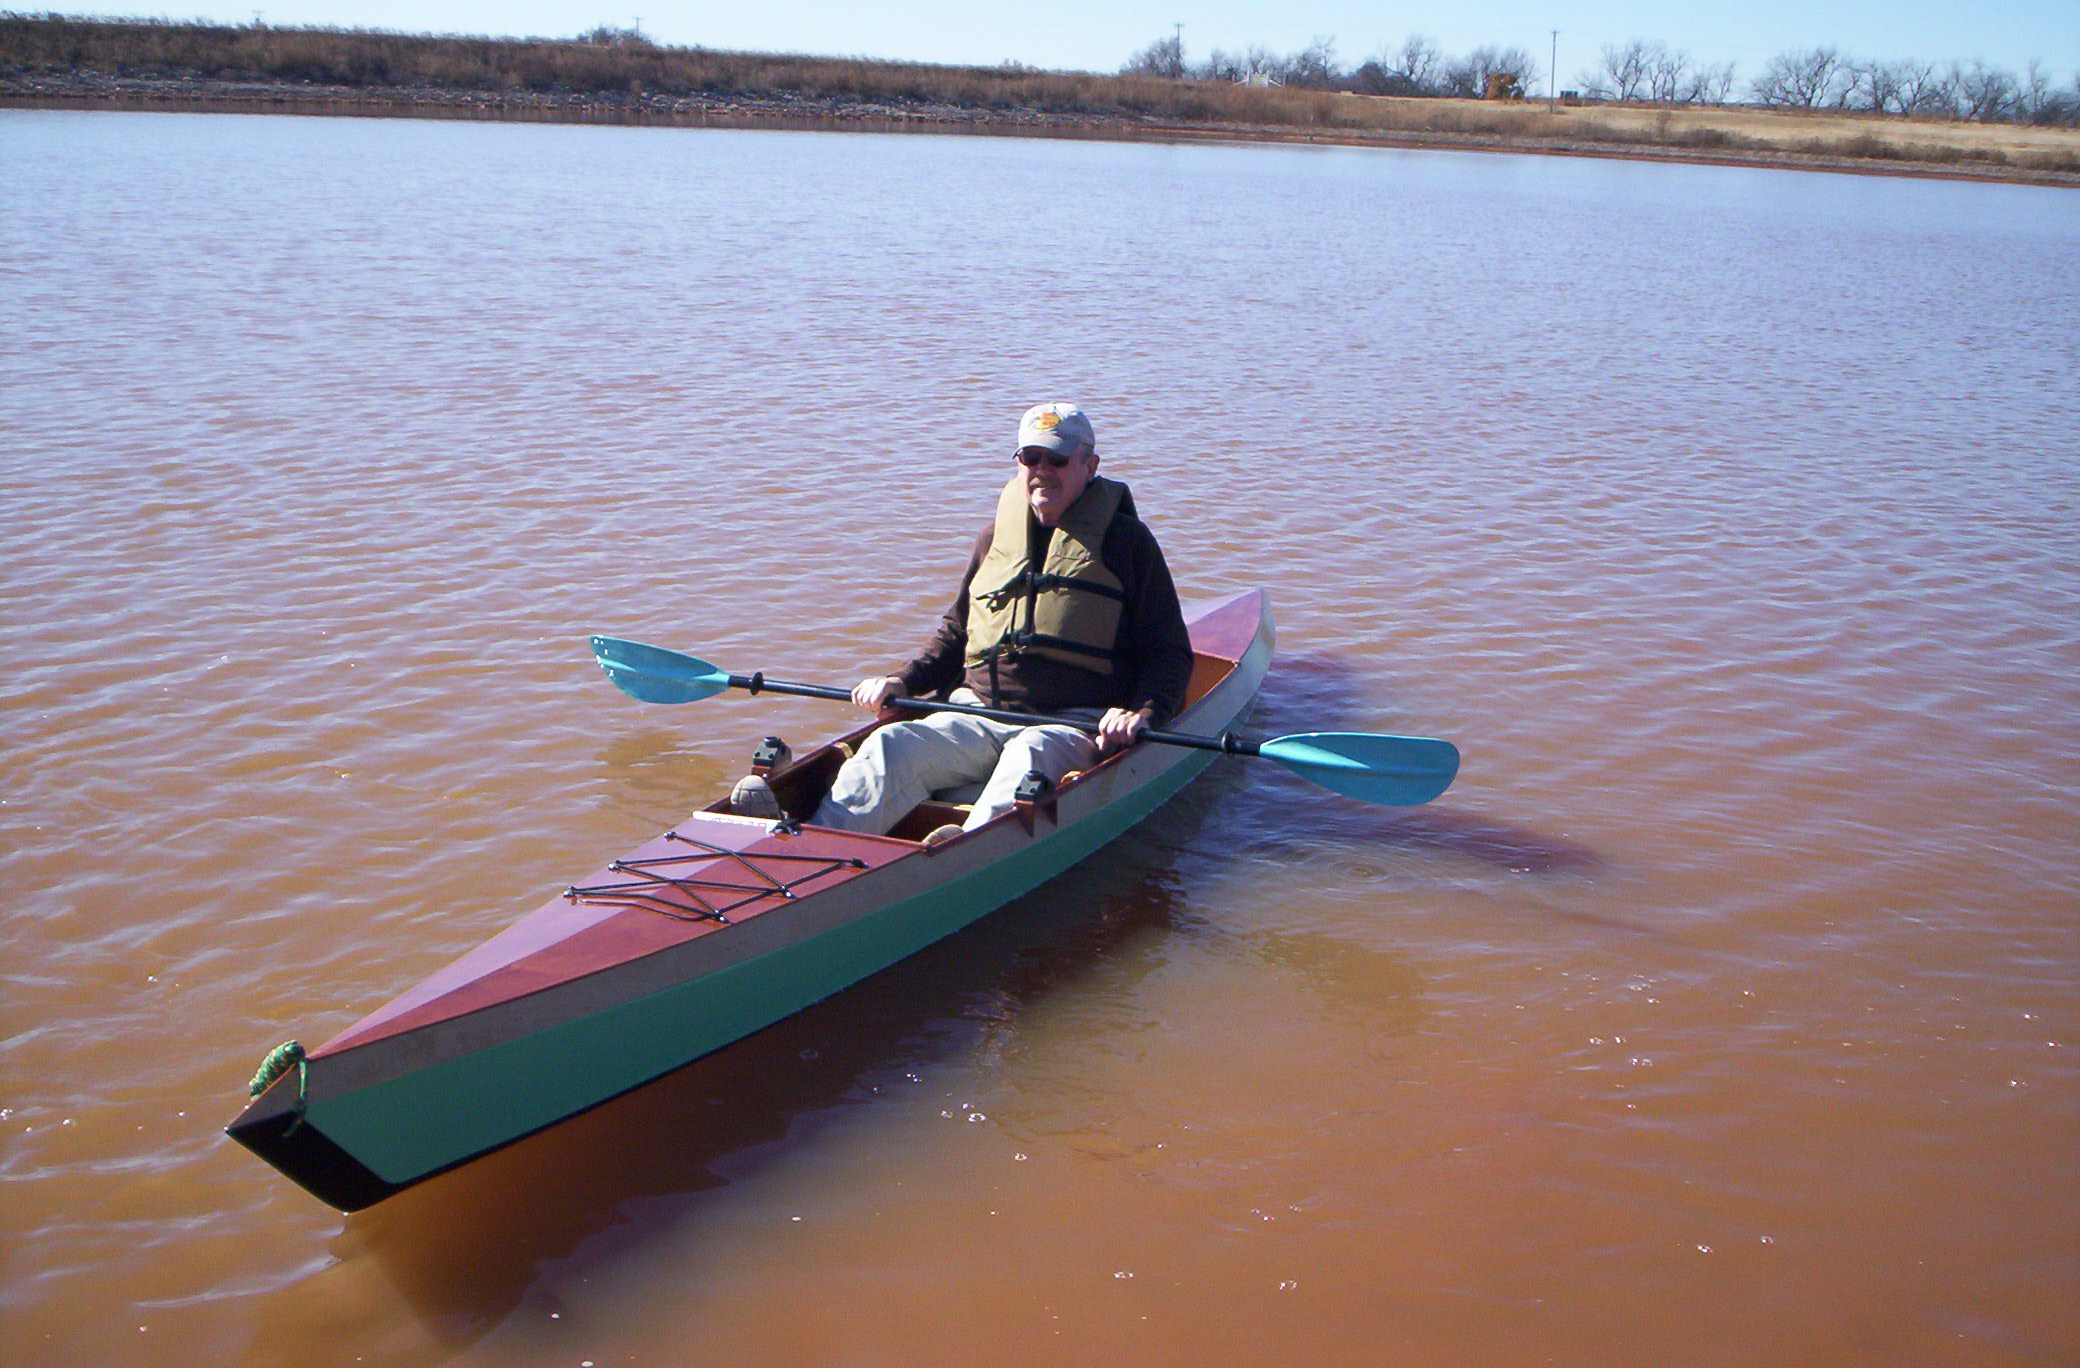
 MICHAEL DAHL'S 15' JEM Kayak

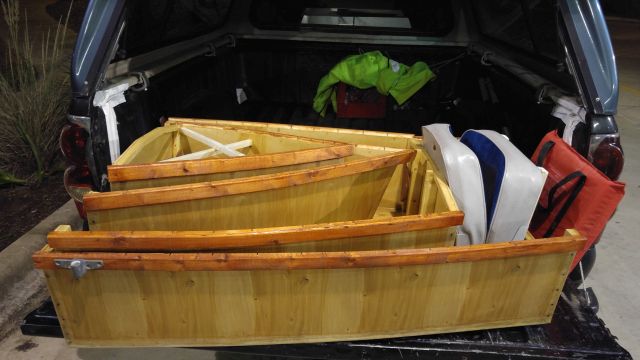
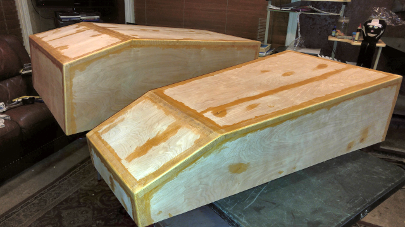
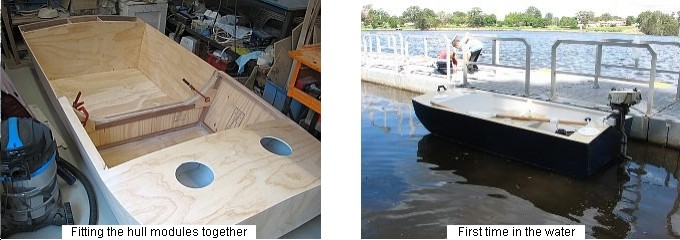
Packing a conventional 15 foot kayak into a vehicle for transport seems impossible. But, Micheal Dahl did jut that. Using ingenuity and an idea from our portable boats, he constructed a JEM 15 into a 2 module design for easy transport and storage. The end result is shown in the photos below. Nice job Mike !

 Click on above photos to enlarge.

AUGUST 2014 

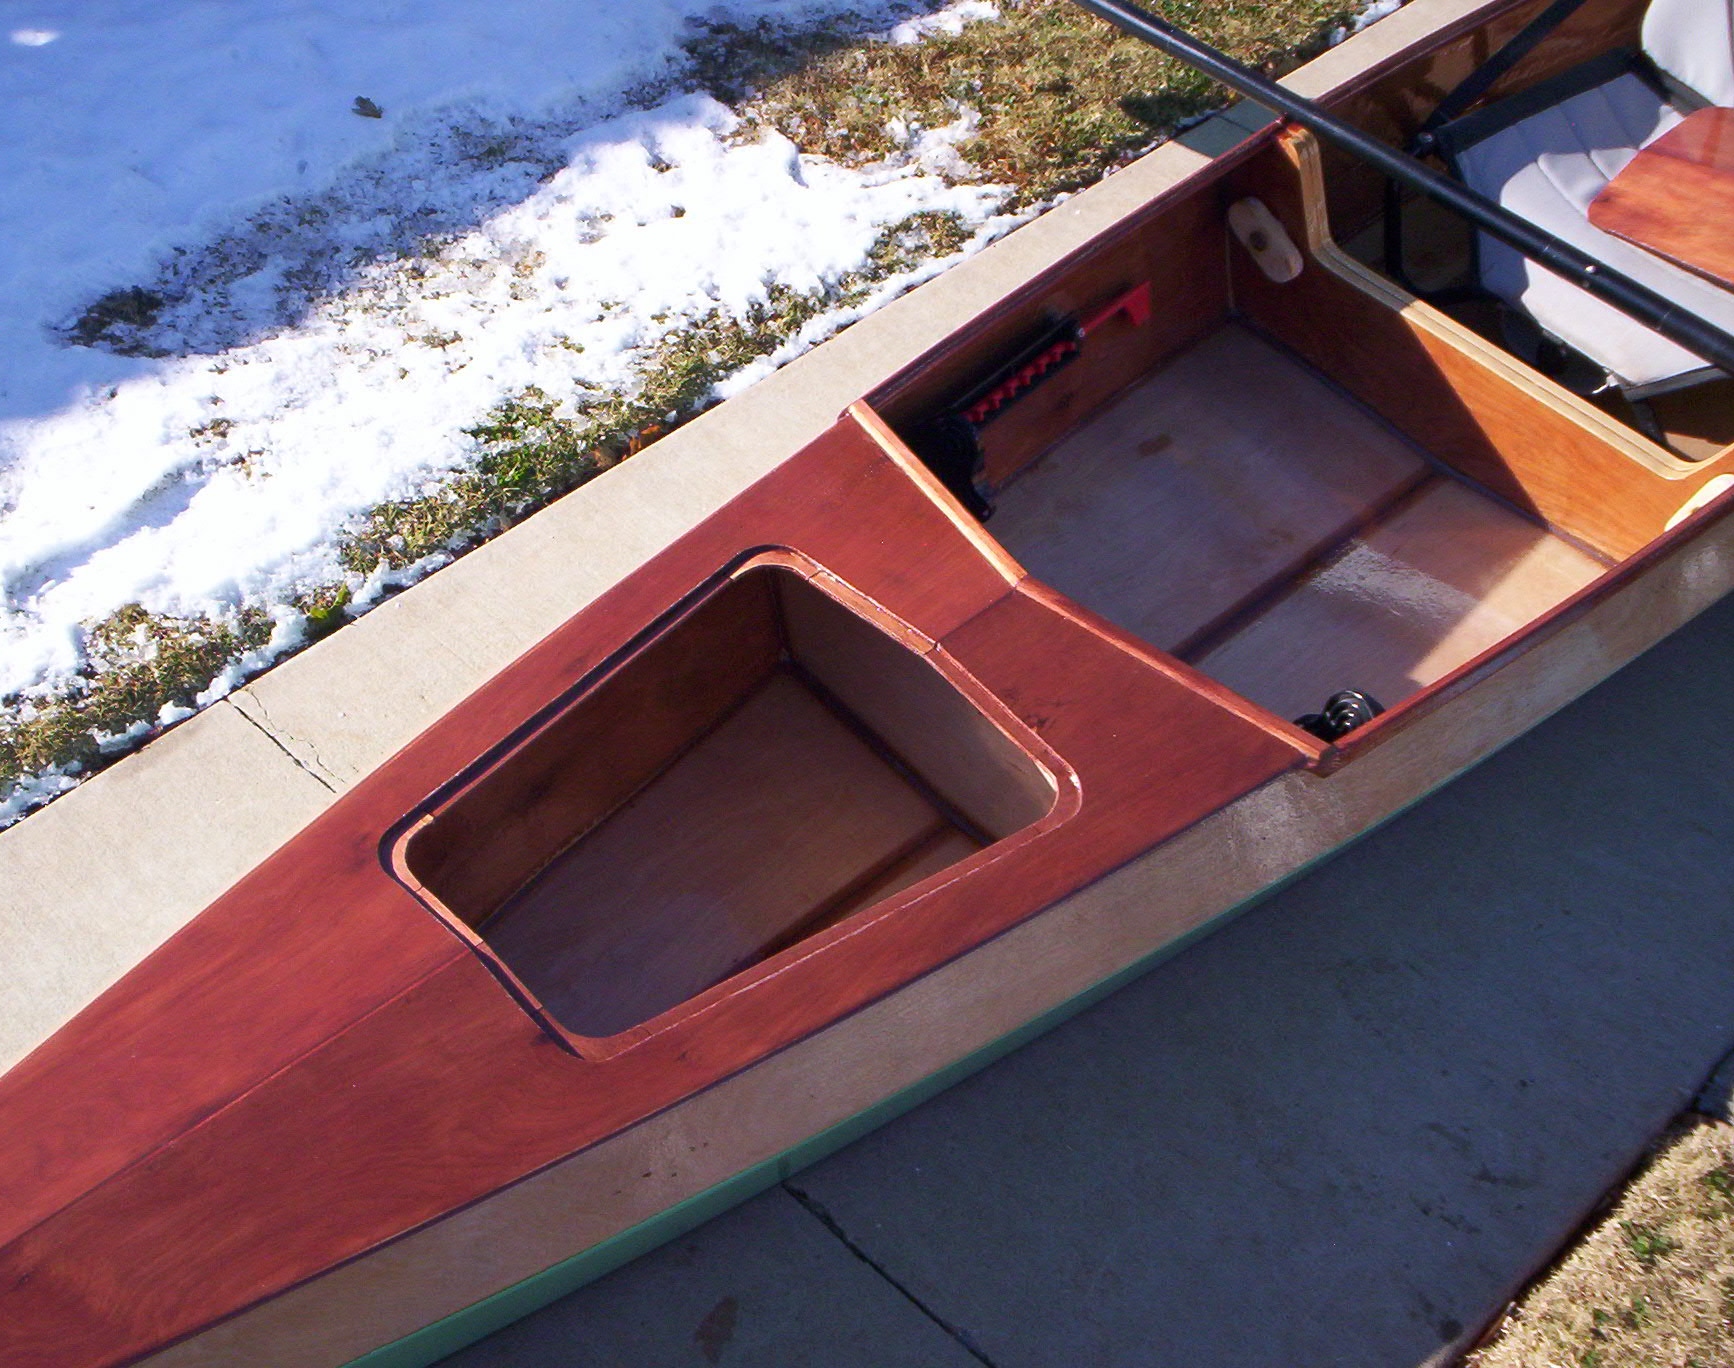
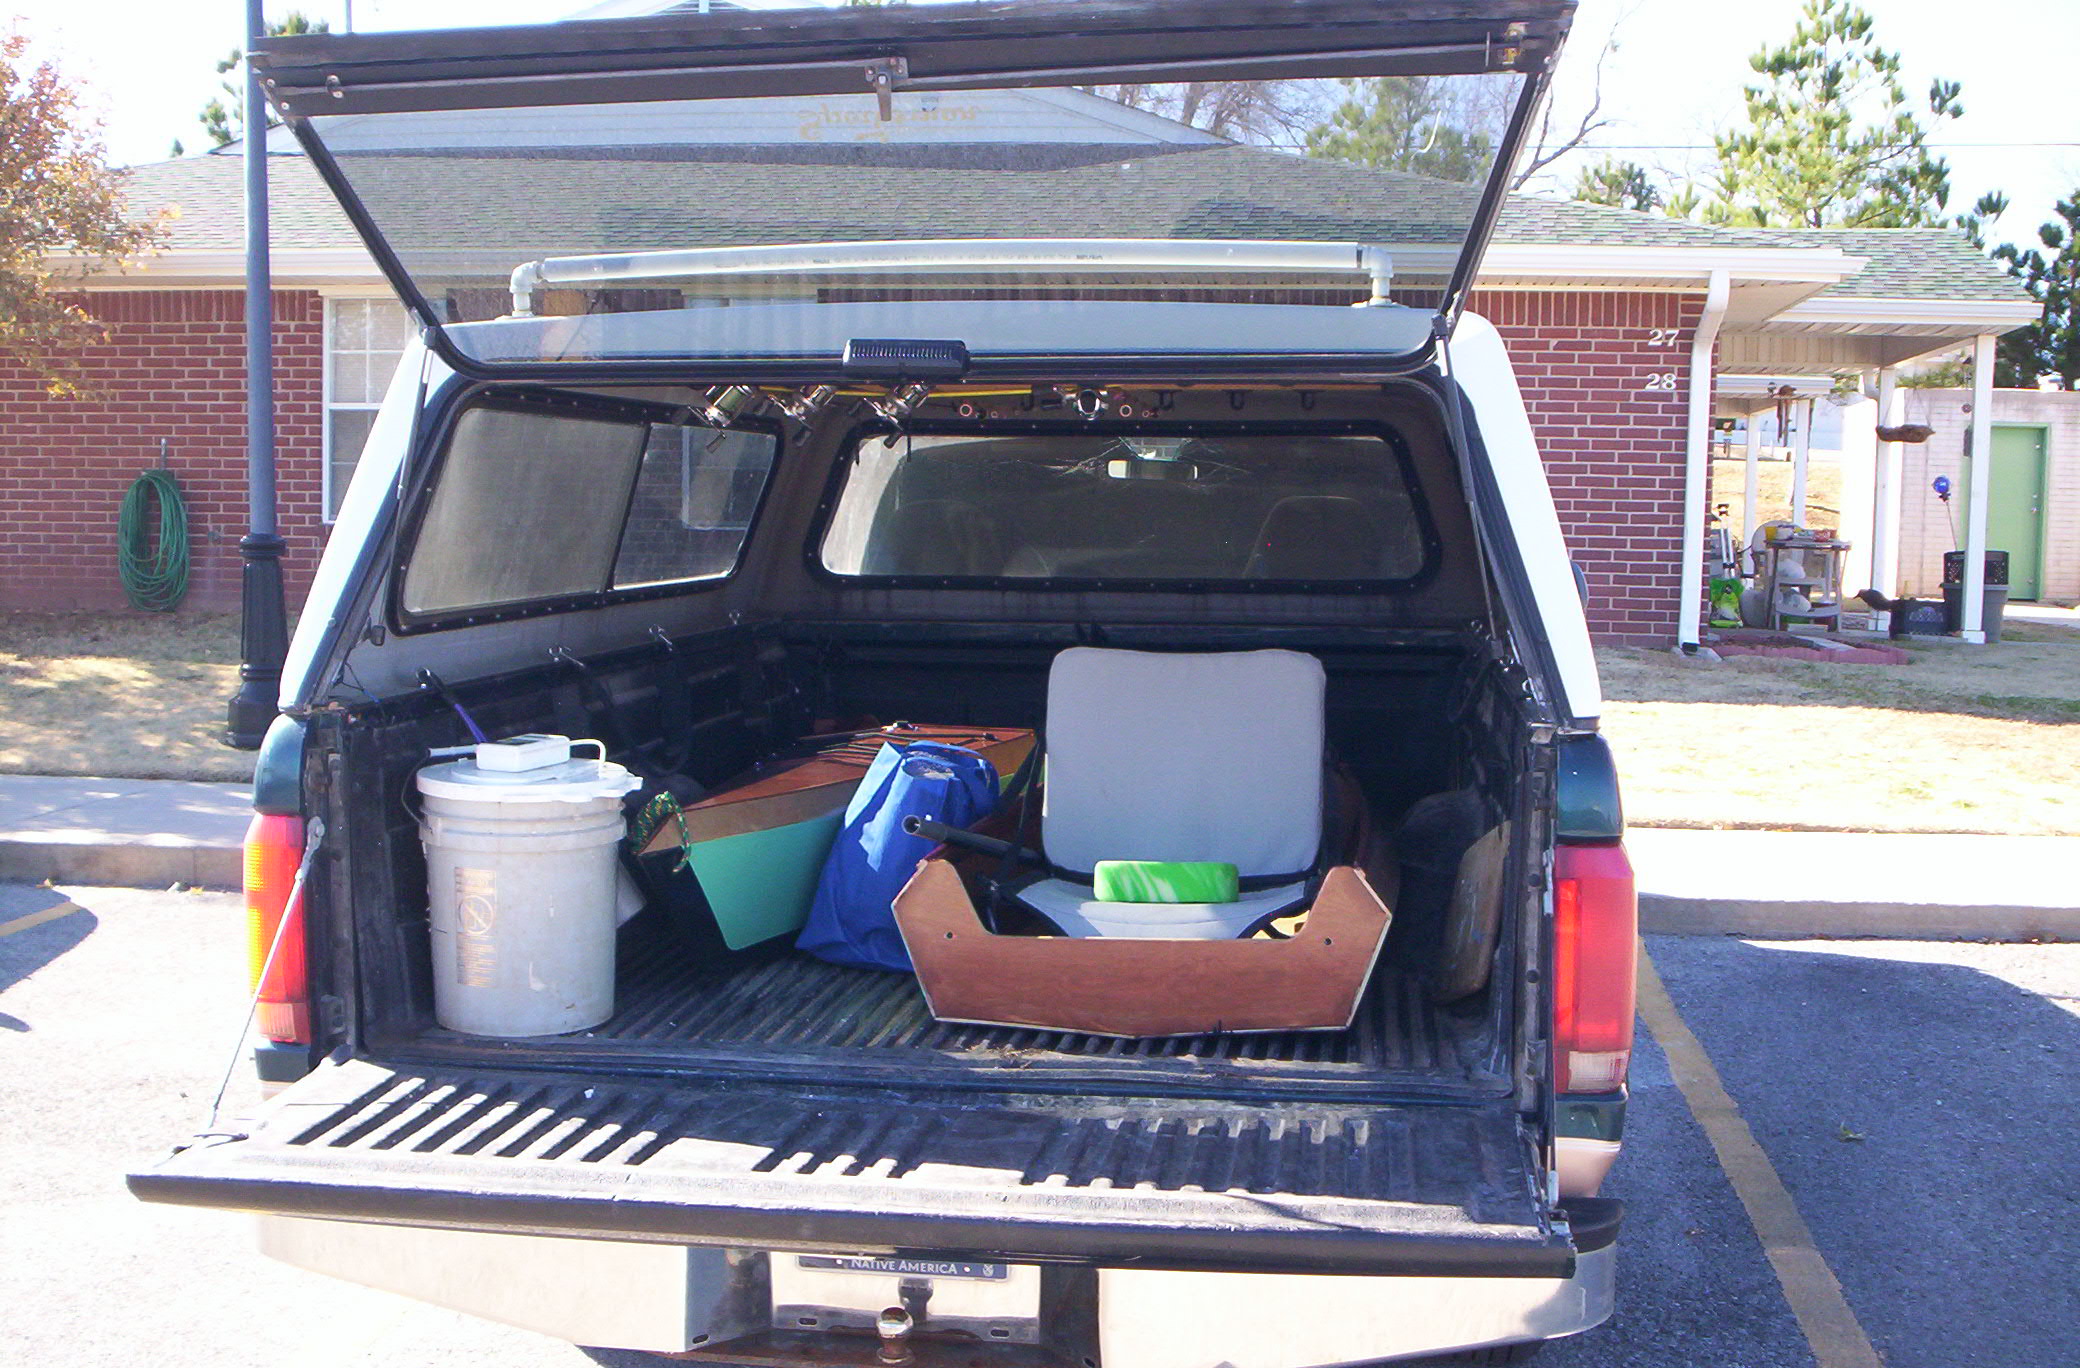
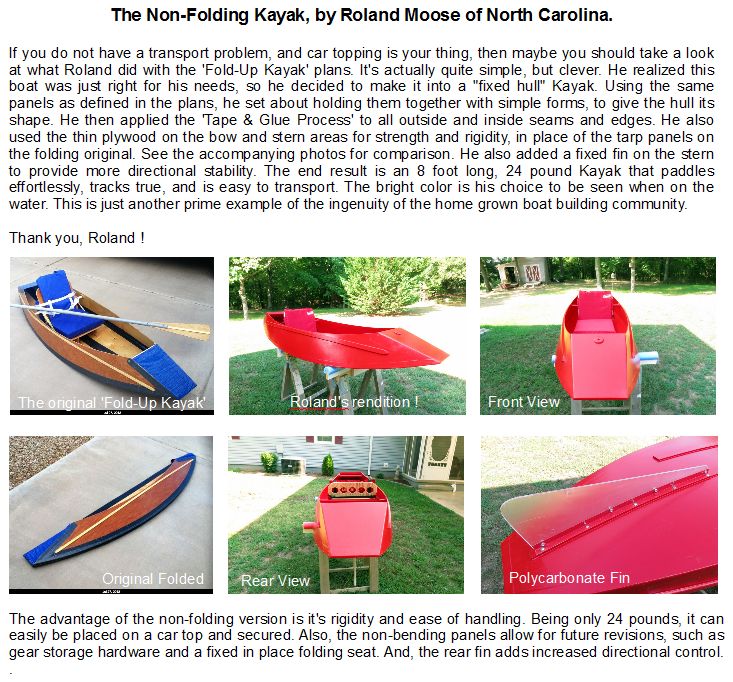
ROLAND MOOSE's build of the  'Fixed Hull' KWIKY

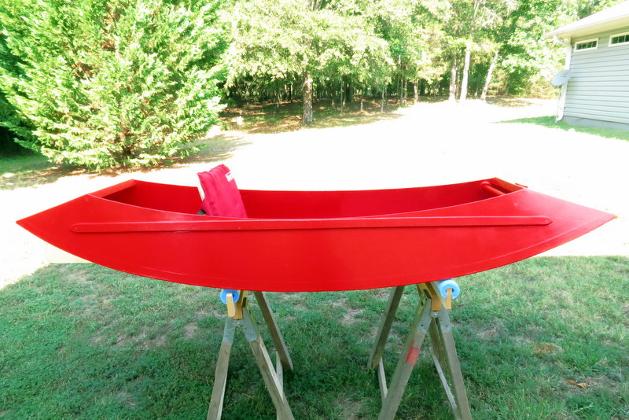
                                                      Click on the file name below to view or print the article. 

RM Kayak Article.jpg RM Kayak Article.jpg
Size : 157.677 Kb
Type : jpg

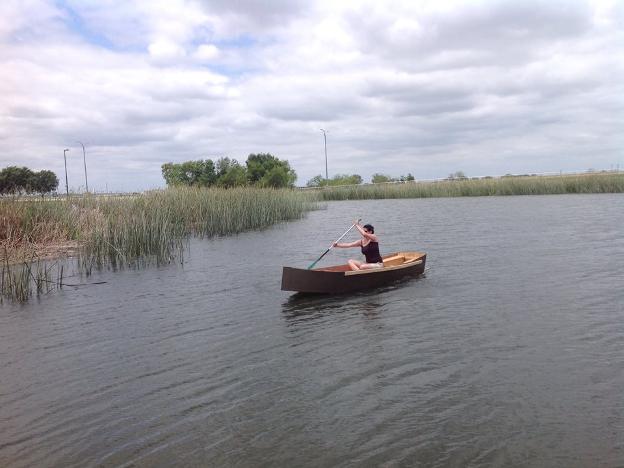
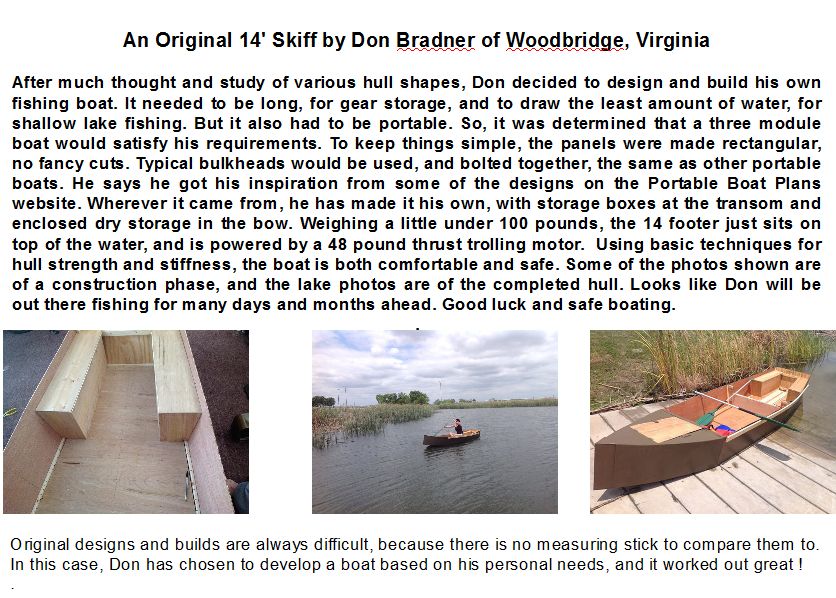
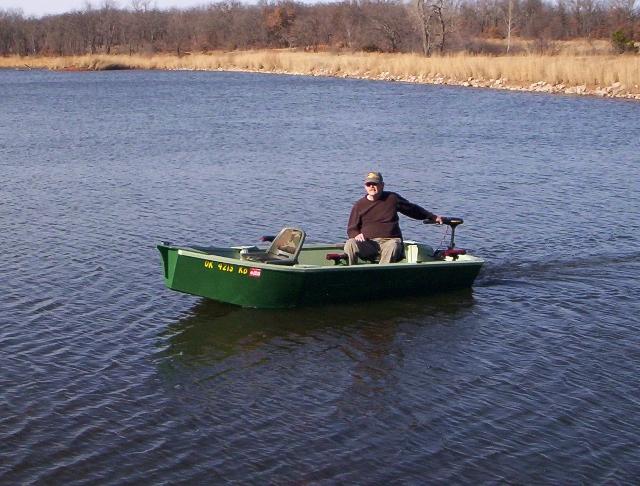
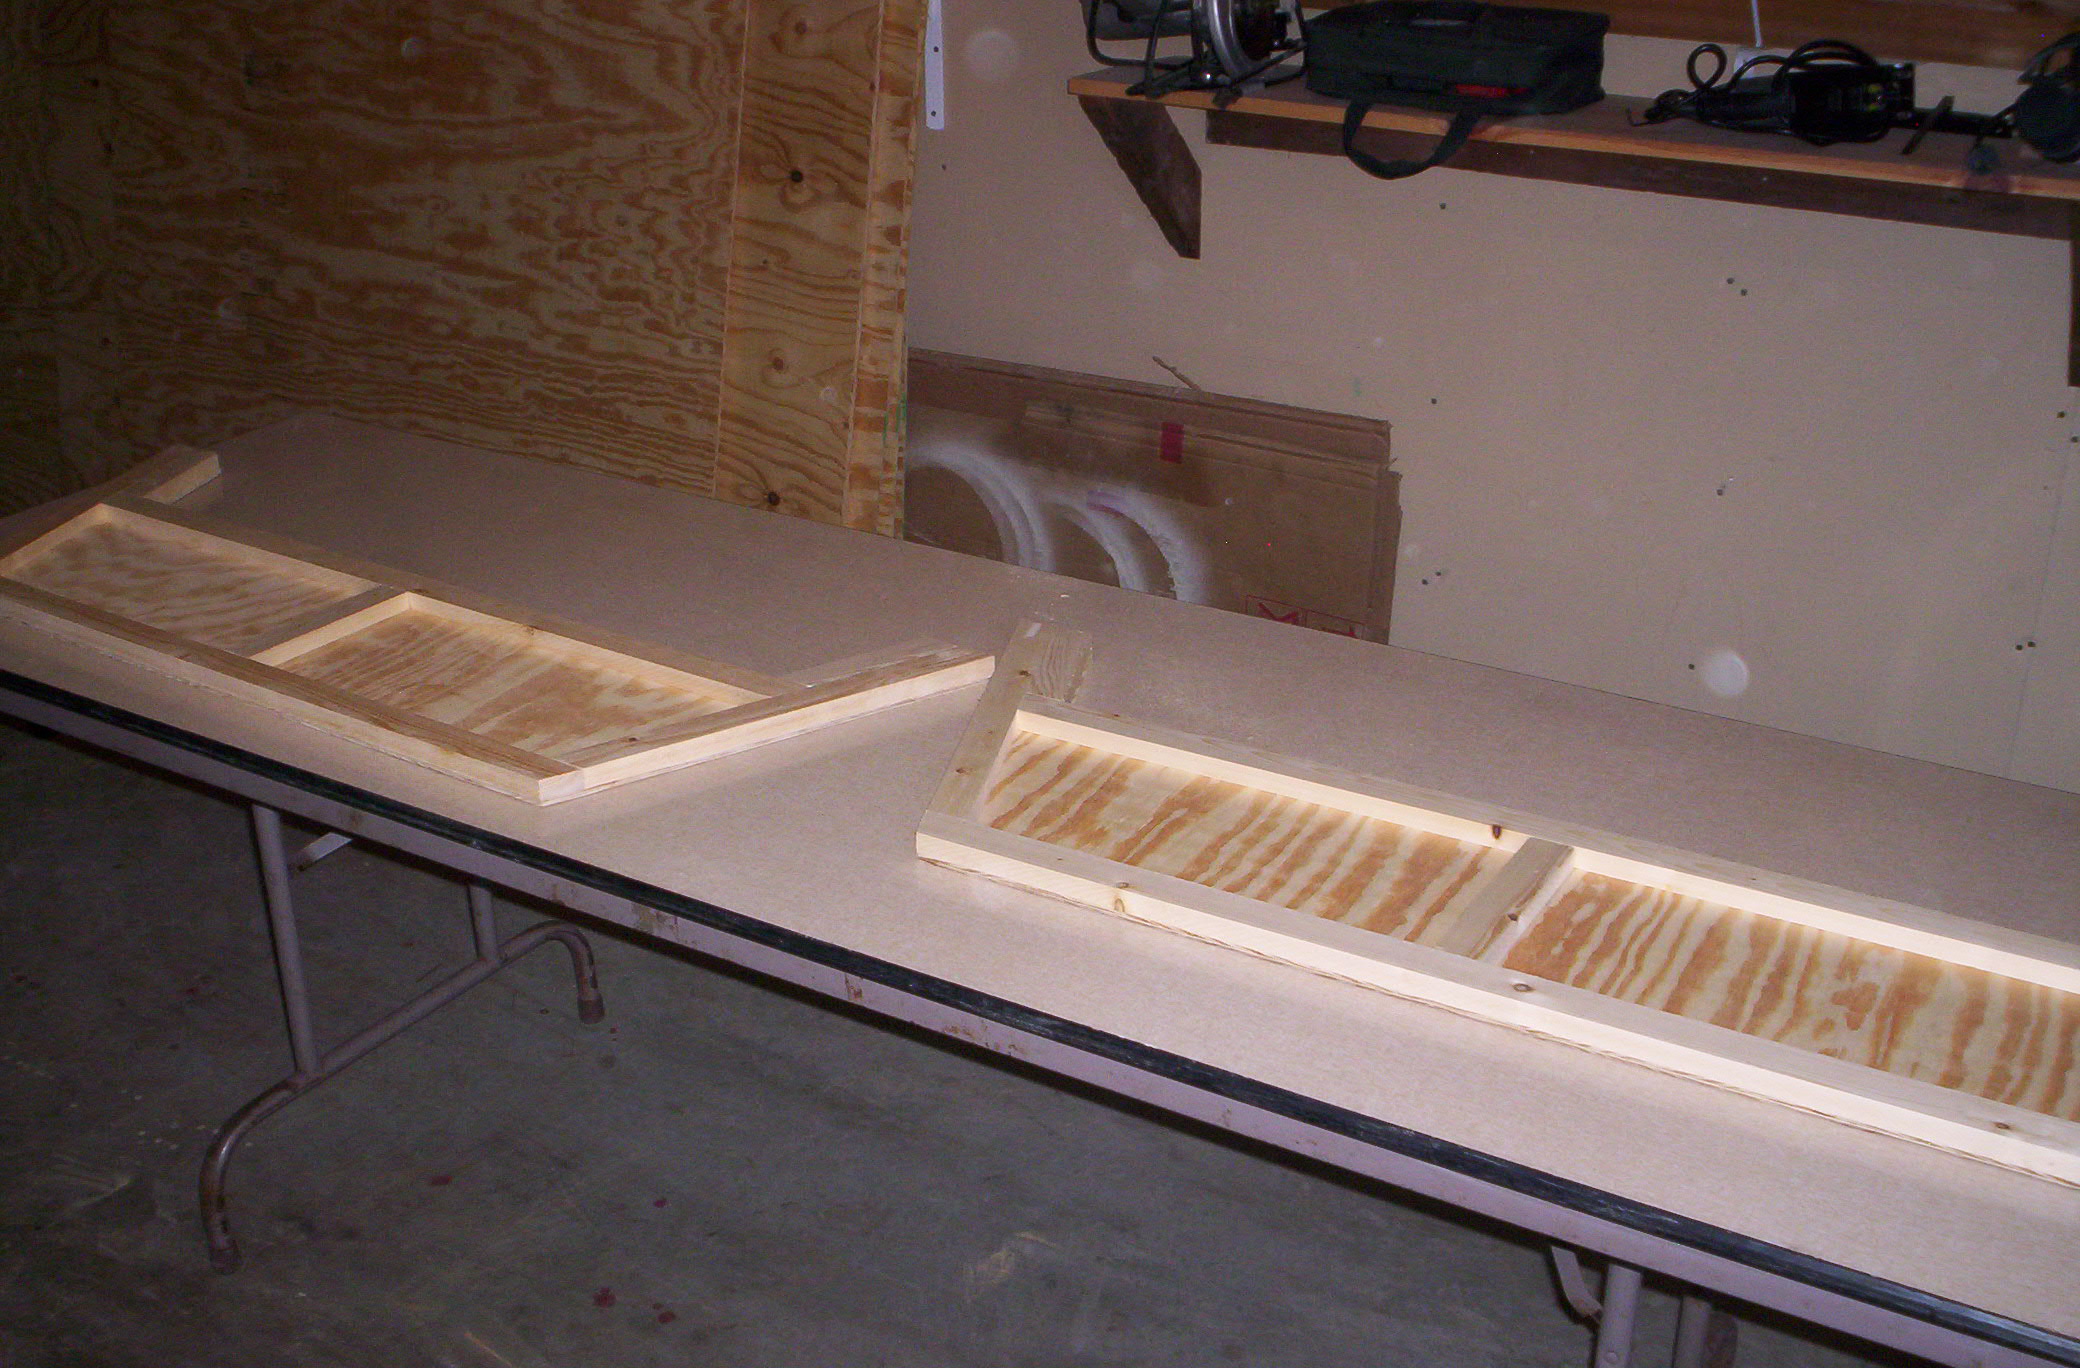
Don Bradner's build of an Original Design 14 foot skiff 

Don Bradner Article.jpg Don Bradner Article.jpg
Size : 157.819 Kb
Type : jpg

JEREMY BRADBERRY's build of the QUAD

Jeremy's Article.pdf Jeremy's Article.pdf
Size : 882.492 Kb
Type : pdf

February 2014 

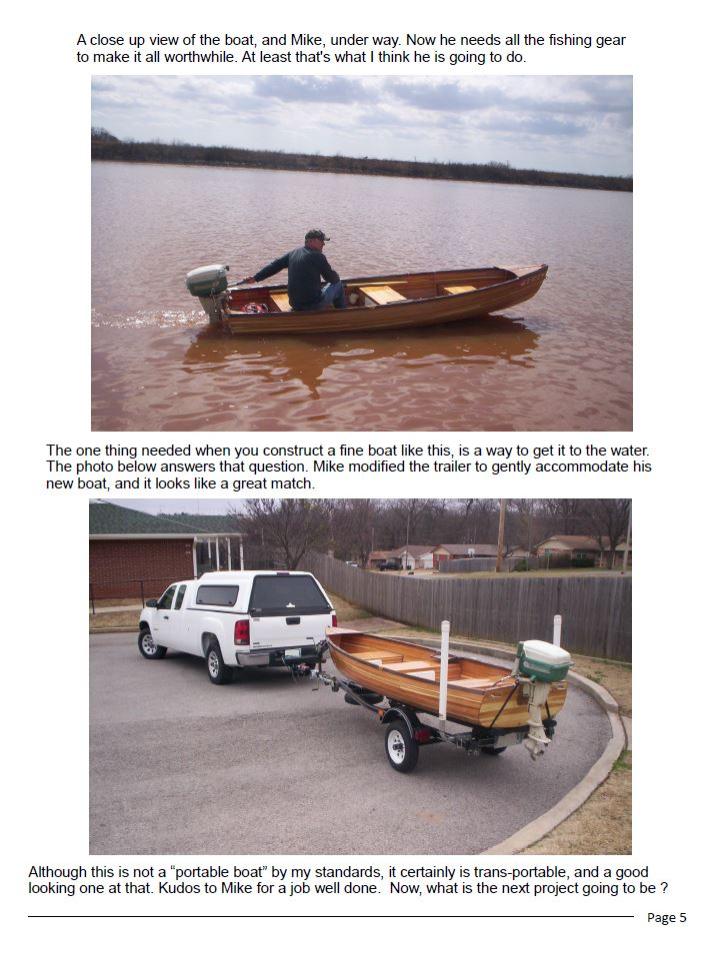
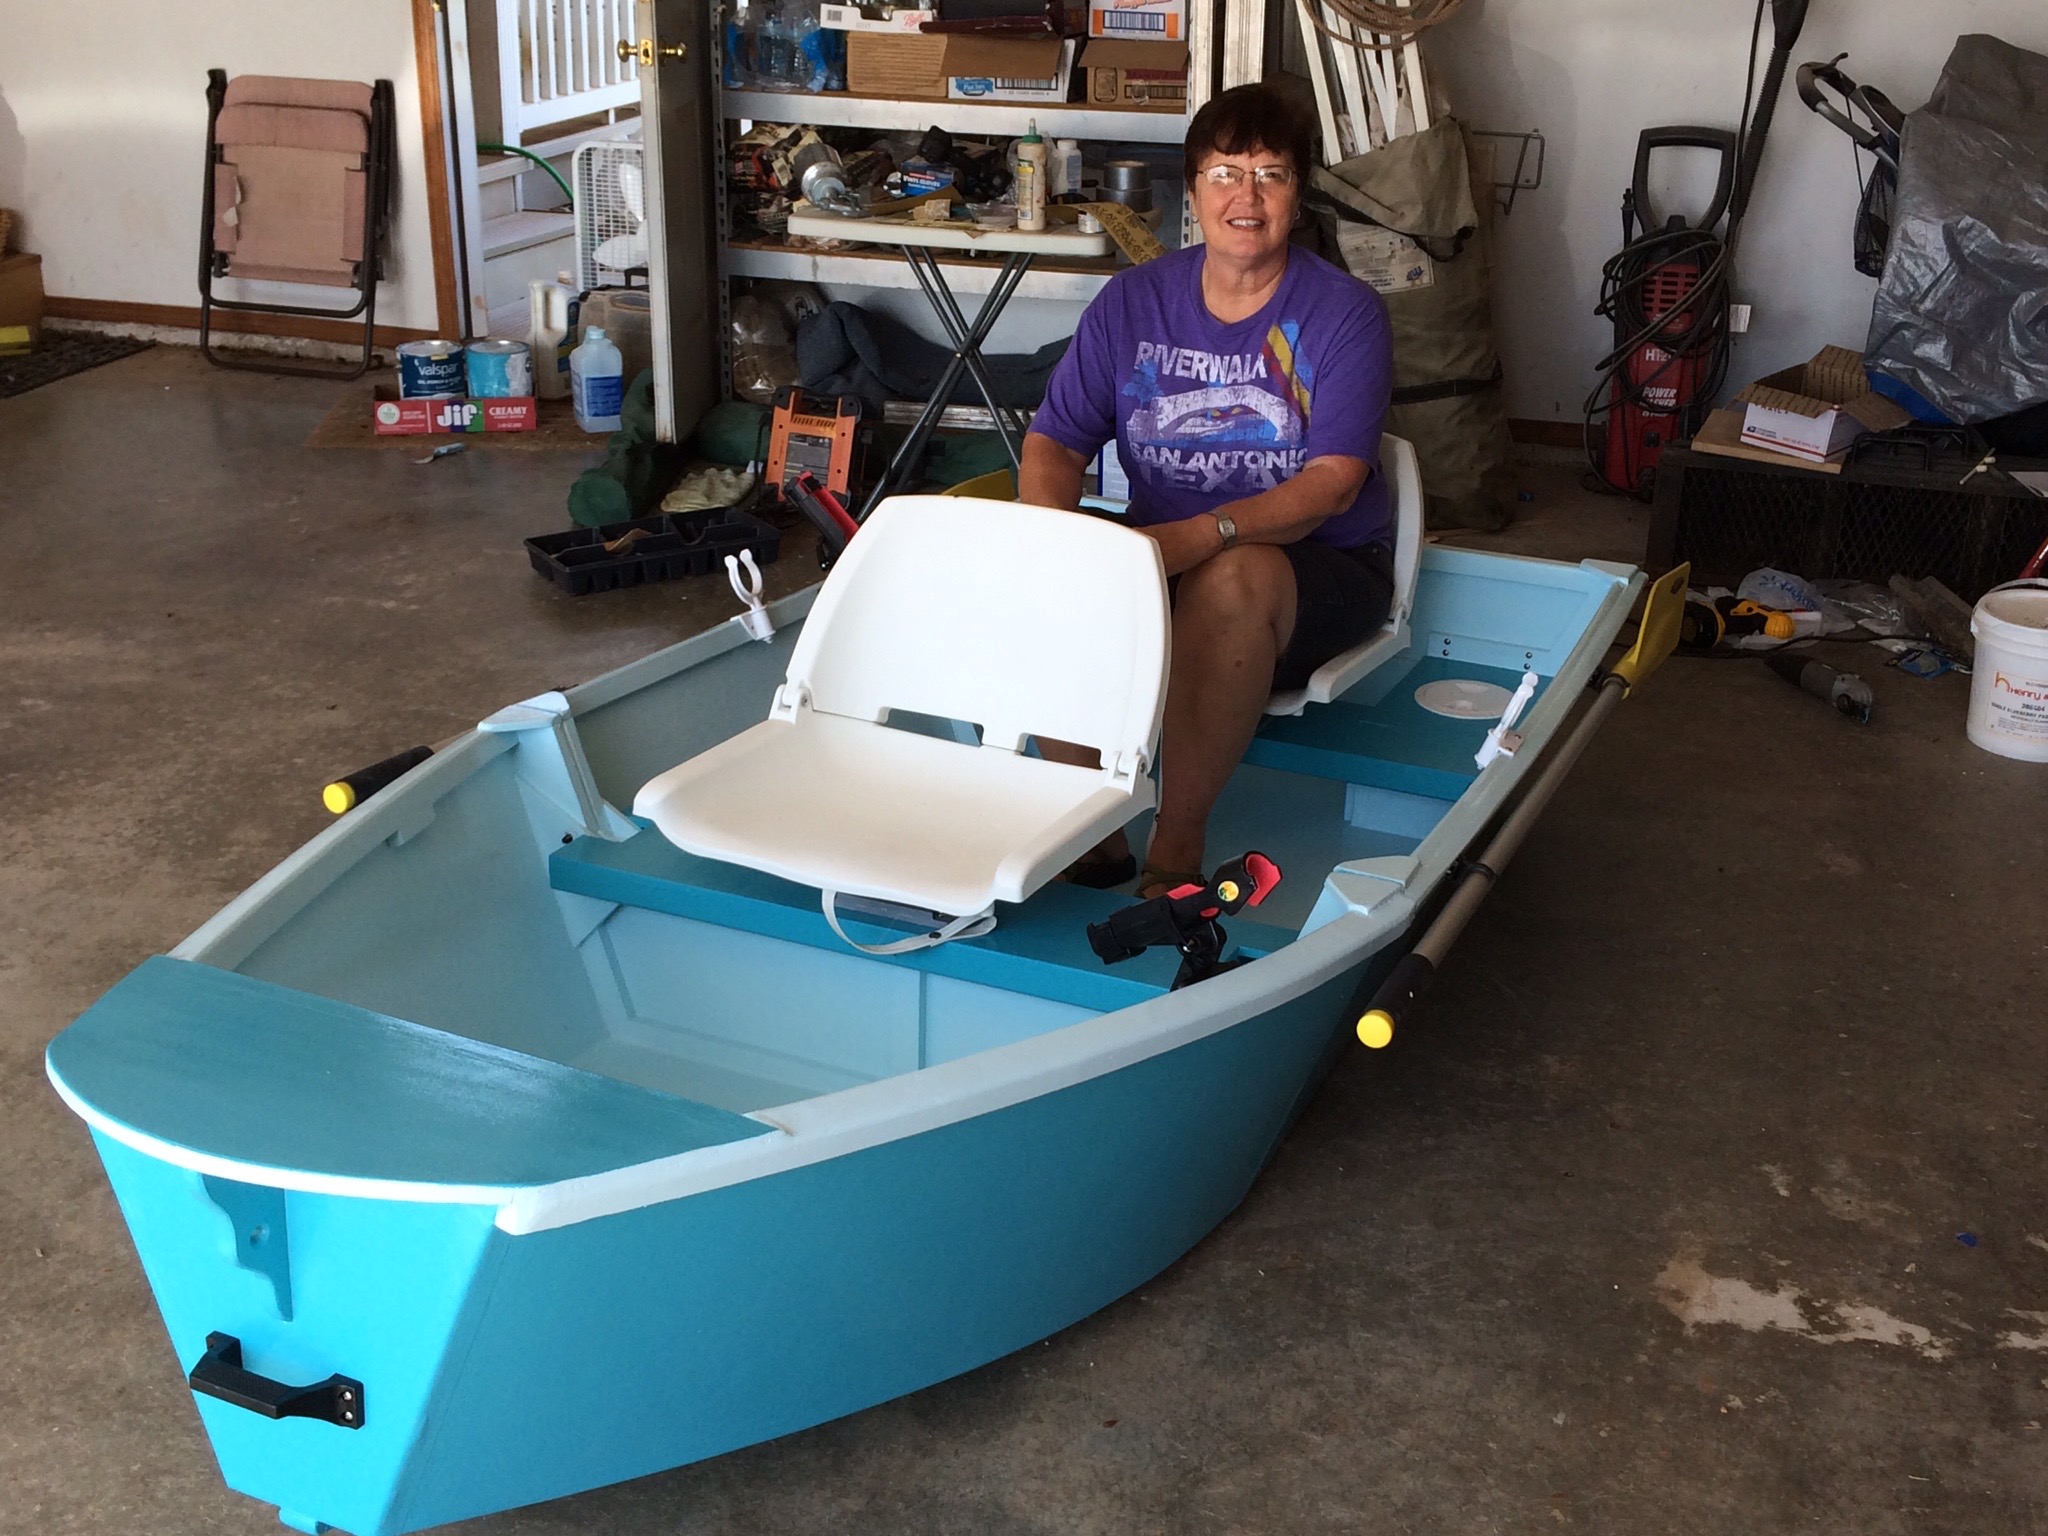
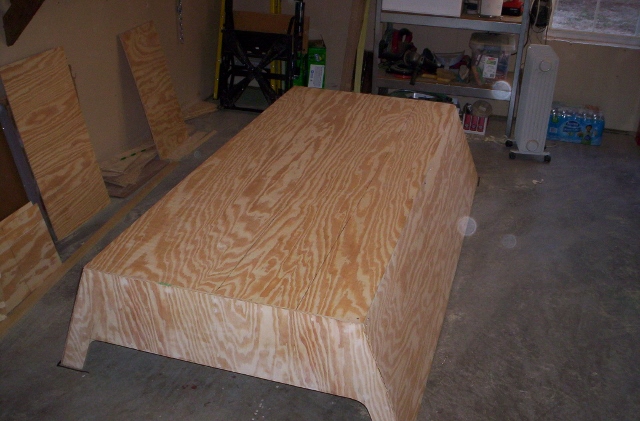
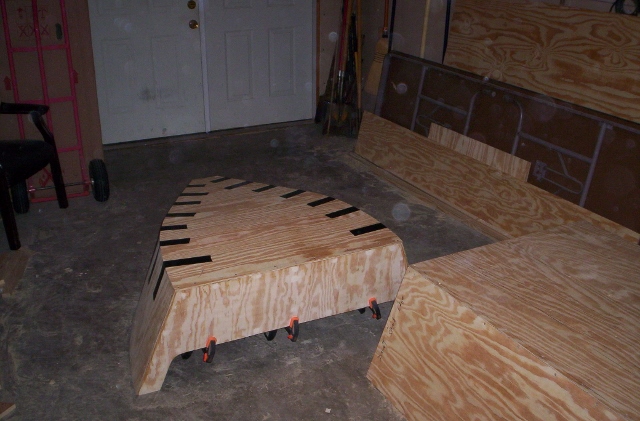
Mike Dahl's Pollywog 

 First, I have to say that I thoroughly enjoyed building this boat. Your plans are well illustrated and easy to follow. I am already thinking about building the Quad or the EZ2 Canoe next winter. 

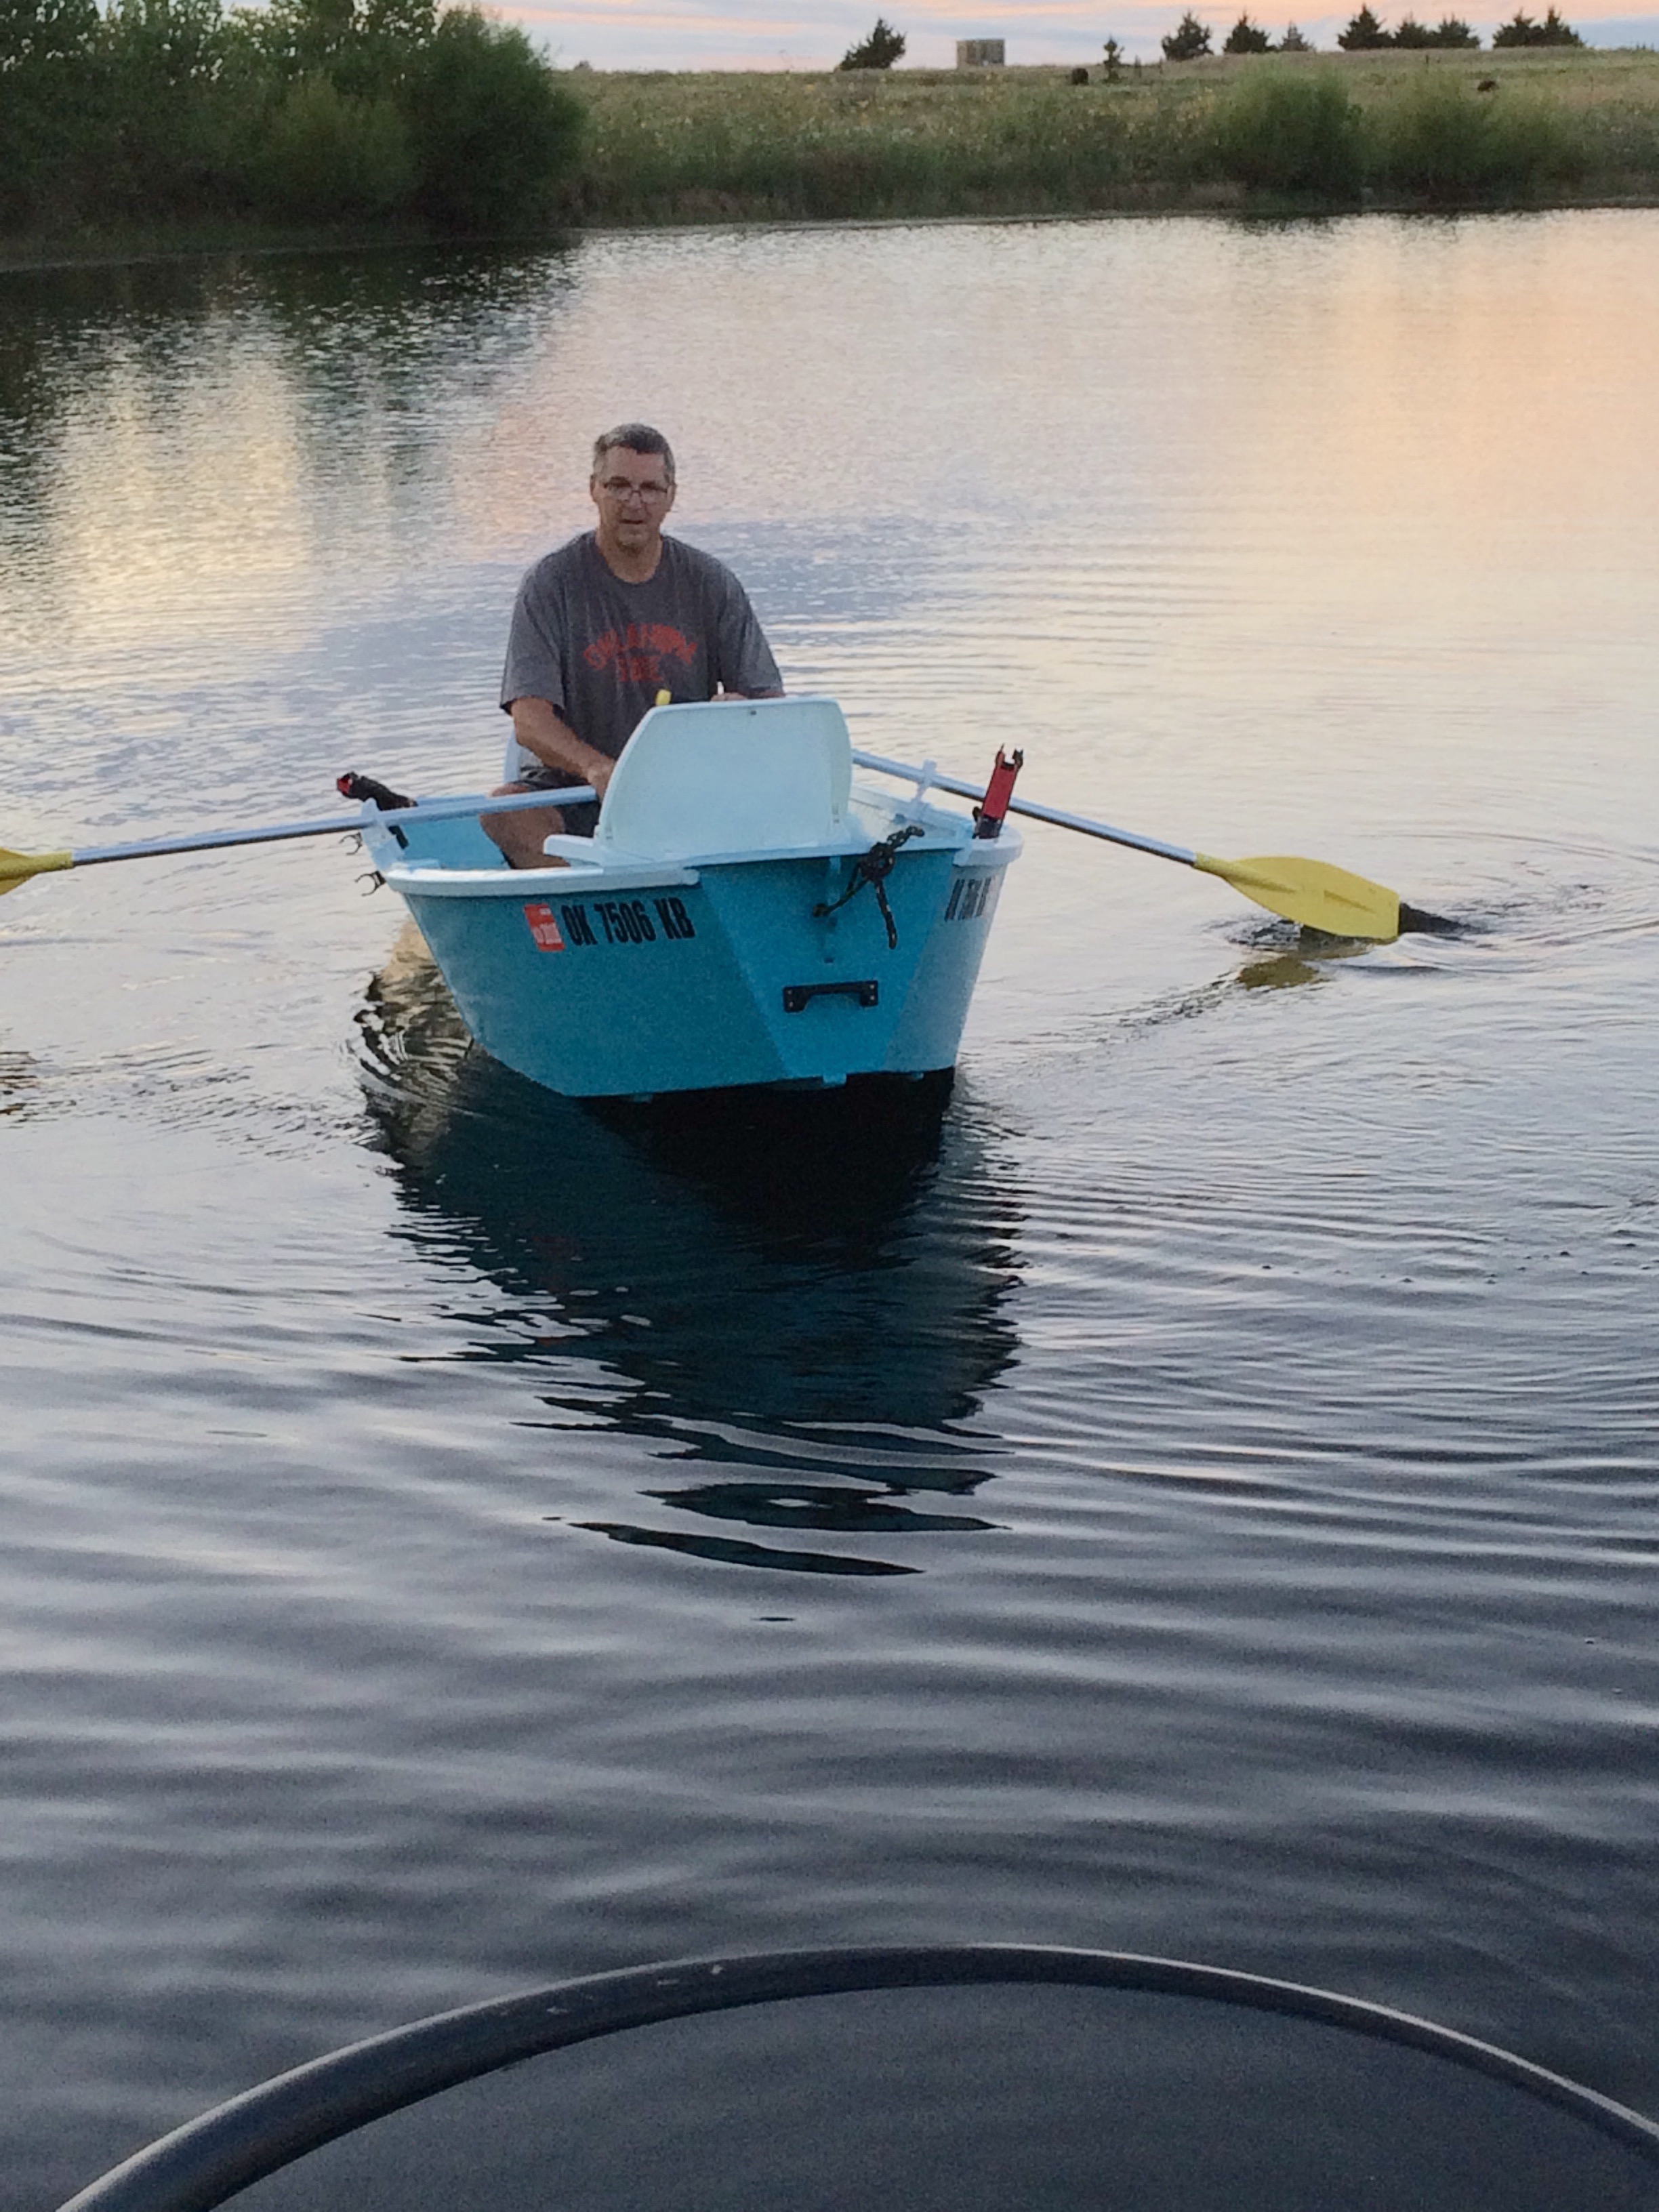
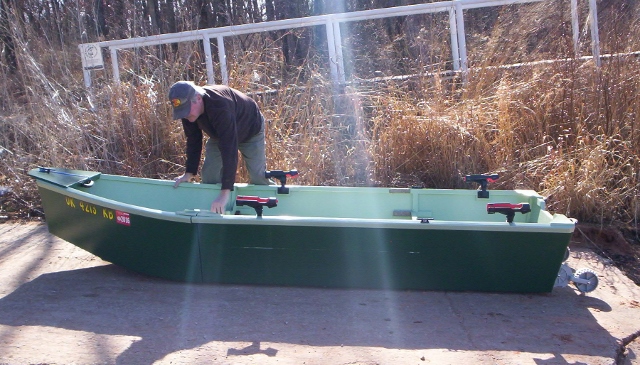
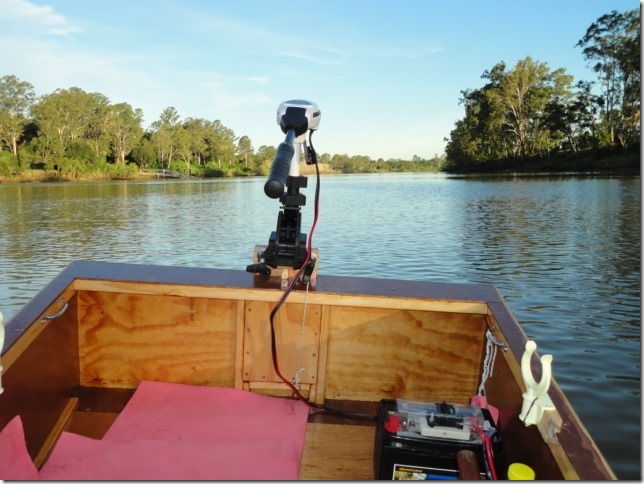
The weather here warmed enough that my wife and I could take the new Pollywog out. The 30# thrust trolling motor that I used today pushed it around fine for use on a small lake. I have acquired a 4 hp Johnson outboard which I will try next time out. The boat handles well and is very stable. I think it will sit just right in the water when my fishing partner is with me. The 11 foot length will be adequate for two fishermen and their gear and it fits in a full sized pickup with room to spare. Thanks for a great set of plans. 


       Being close to retirement at 64, I have hopes of getting to the various lakes in my area to do a little fishing. My wife and I are apartment dwellers, so I wanted a boat that two people could be comfortable in and fit in my pickup with camper shell for transport and storage. Upon finding your website I felt like the 11 foot version of your Pollywog would be what I was looking for.


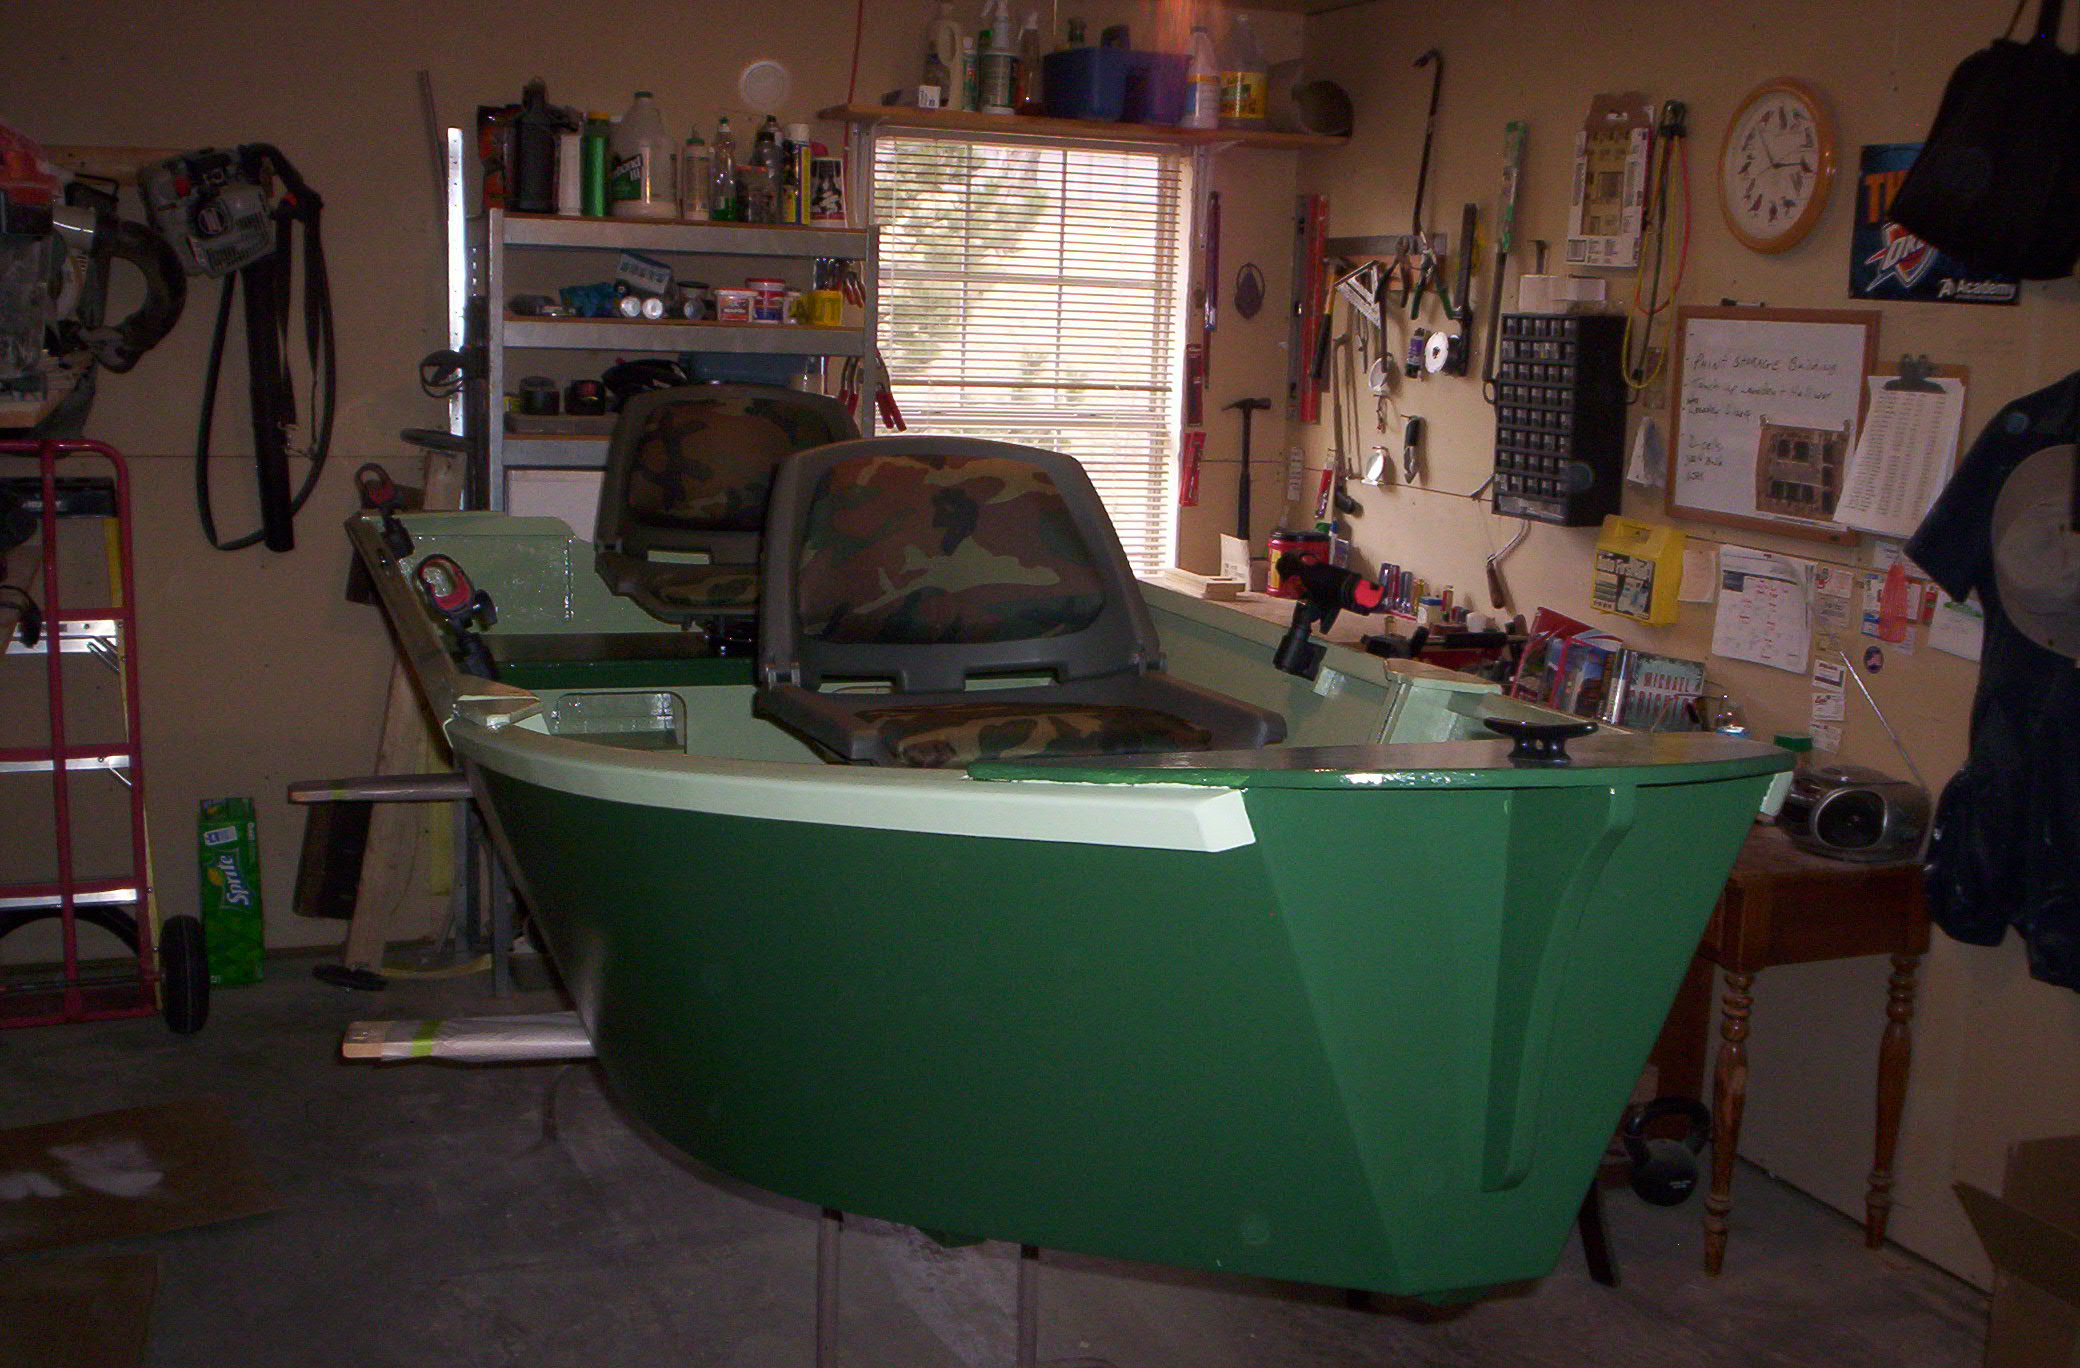
Various construction and assembly pictures above. Click each to expand. 


 A few days after Christmas 2013 I went to the lumber yard and bought the materials I needed to get started. I had printed out the plans I received from you and found them easy to follow. After cutting out the parts I found the tape and glue process easy to manage with Titebond 3 and Fibatape doubling the layers of tape inside and out. When it came time to paint I used oil based primer and Valspar porch paint.  I changed the seating arrangement so that I could have swivel seats and take them out to make loading easier. Rod holders make fishing more relaxing and fold up transom wheels aid in moving the boat into the water. I found the boat building process very enjoyable and look forward to another build next winter. After all, a person can't have too many boats! 

        Thanks,

          Michael Dahl

          Noble, Oklahoma


Mike is one happy guy, just waiting for fishing season to begin. 

September 3013 

See what another accomplished builder can do with a simple boat design.

Click on the PDF file name "StixArticle"  below and view or print.

StixArticle.pdf StixArticle.pdf
Size : 1210.825 Kb
Type : pdf

AUGUST 2013 

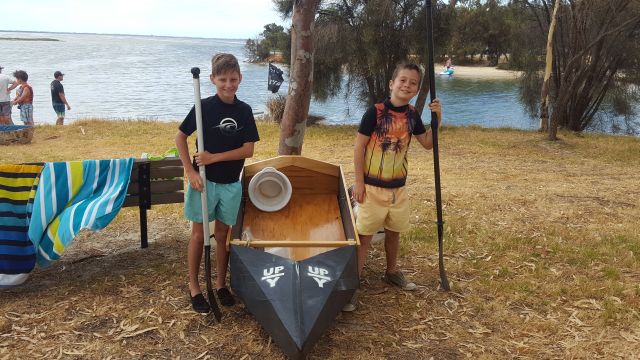
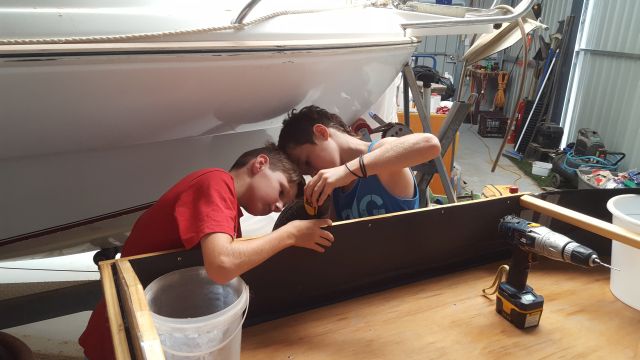
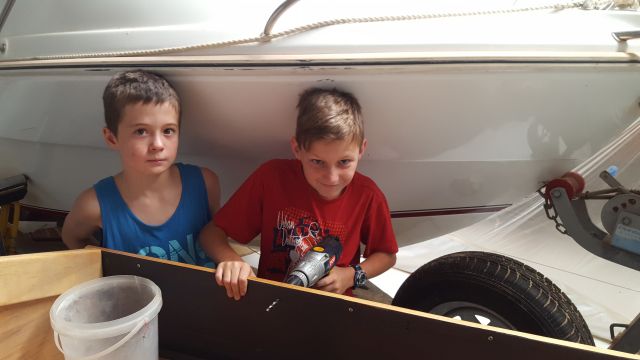
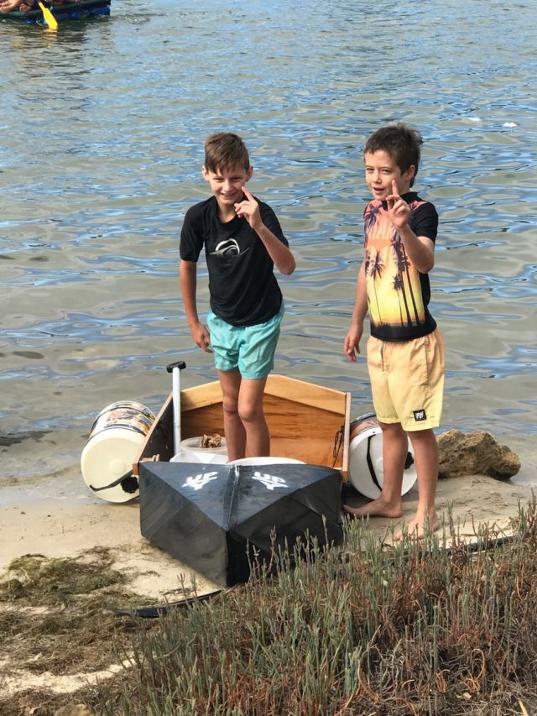
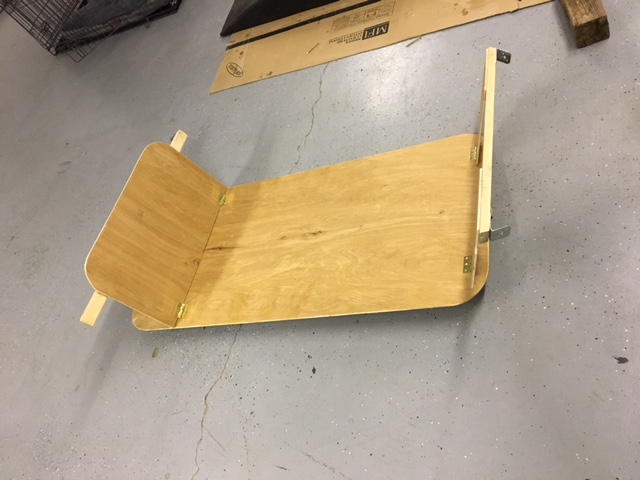
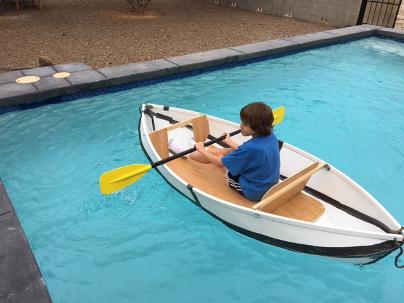
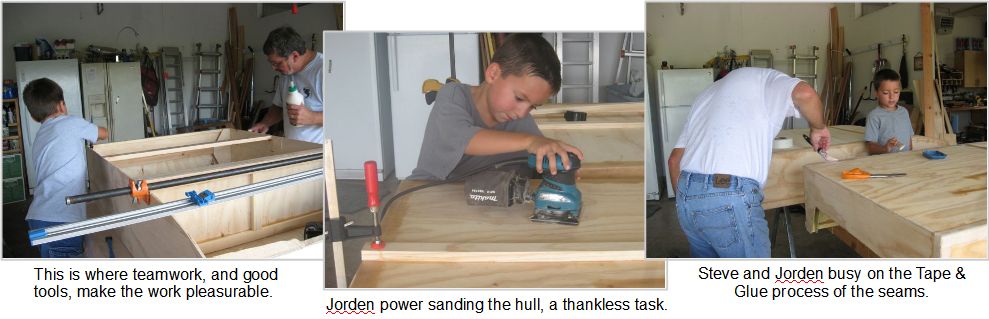
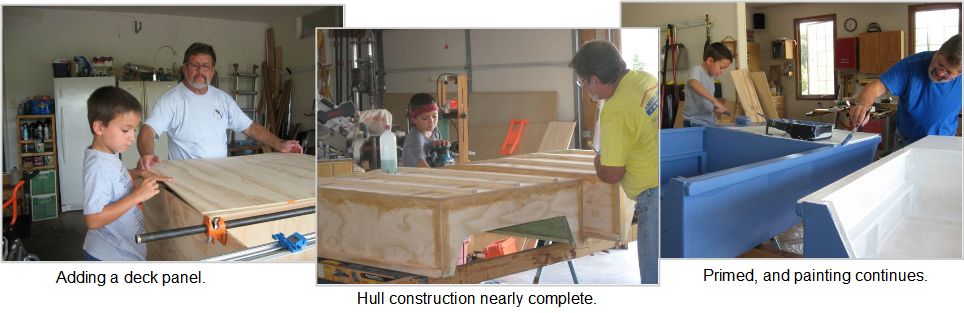
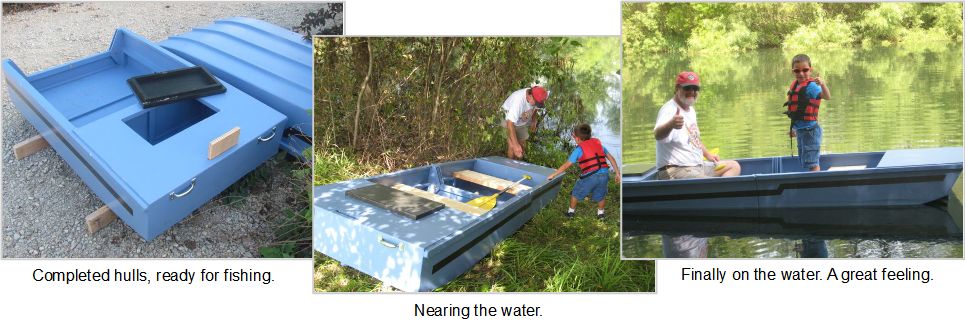
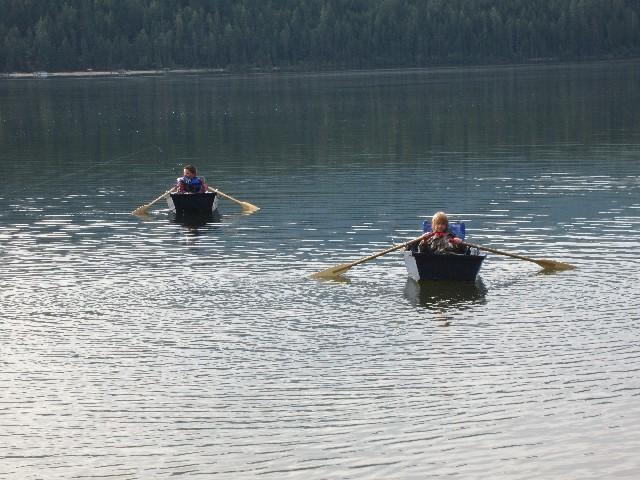
 The following article, about 2 BOY SCOUTS working hard to earn their Woodworking Merit Badges, is an inspiration to all of us.  Click on the PDF Title "Boy Scout Article" below for the complete story. 

Boy Scout Article.pdf Boy Scout Article.pdf
Size : 1406.171 Kb
Type : pdf

MAY 2013 

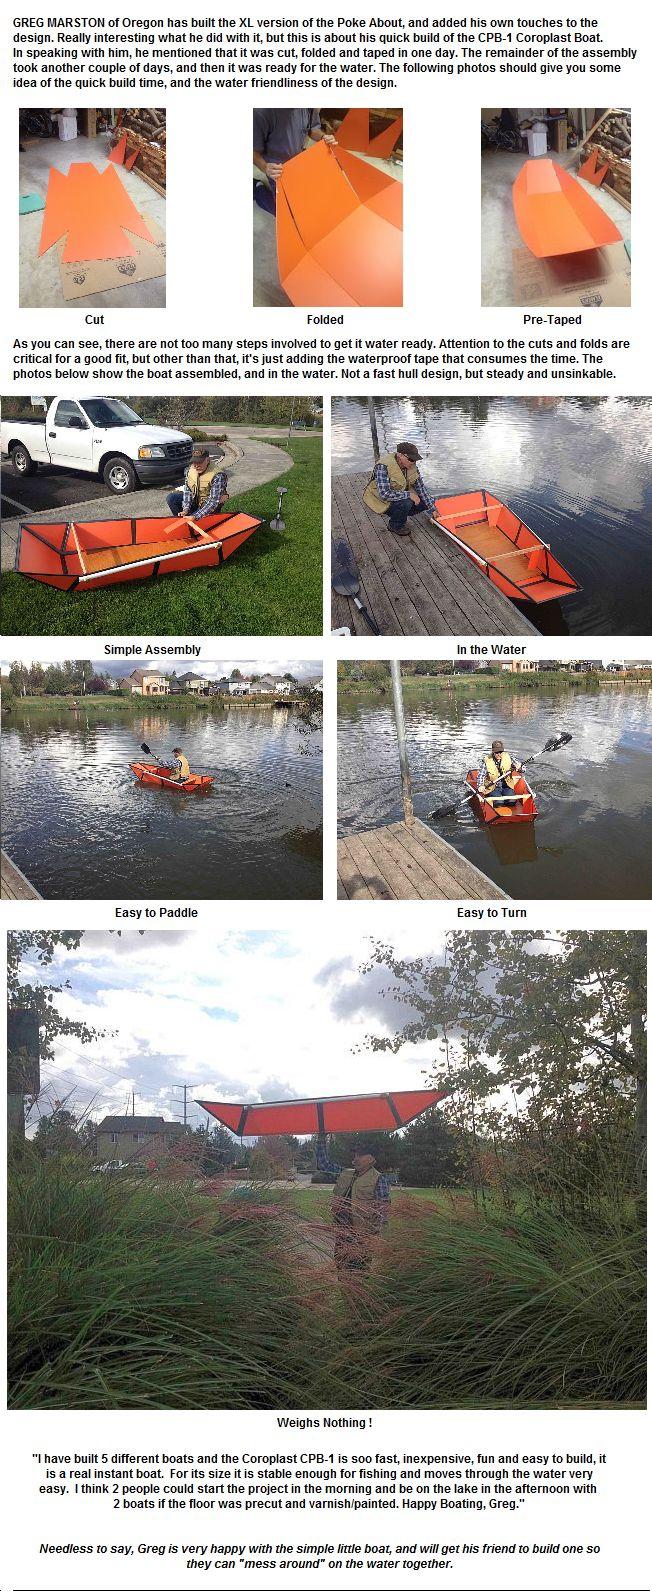
The following article is about Richard Atkinson, a first time boat builder, and his Poke About XL. 

Click on the PDF Icon Title  (RA Article) below the photos to open the full article.

RA Article.pdf RA Article.pdf
Size : 1421.619 Kb
Type : pdf
NOVEMBER 2012

October  2012 

April 2012 

February 2012, an expanded PDRacer by JERRY CANADAY of New York. 

Click on photos above for more project detail. 

August 2011, The Tadpole by Christien Cheviron of France

7/10/2011

Another Australian  has contributed a design and photos of his transportable.  CRAIG TITMUS designed and built the Quarter, loosely patterned after the Toter series nesting modular hull.  His design is long, 4 modules at 11' 4", and has a top speed of 9.5 knots with a 2 hp motor. I was impressed, as I am sure you are, and this is what a nice long water line will produce, with minimal power. He used “take apart” hinges on the hull bottom to resist the bending loads, and securing bolts up near the gunwale, for assembly security. His son Henry says, “You can never have too many boats dad”. 

---------------------------------------------------------------------------------------------------------------- 

7/01/2011

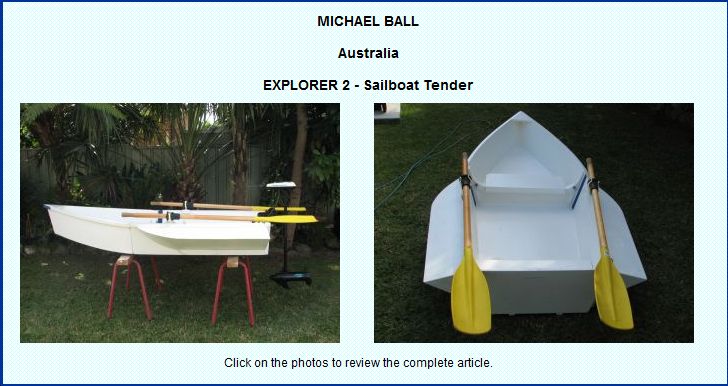
This is an article about  MICHAEL BALL of Australia  building the Ultra-Pram.  He was a first time boat builder, and this story is interesting because it defines what can be accomplished when the builder and the designer collaborate together for a common goal. The end result is a personalized boat, well constructed, nicely detailed and now being enjoyed by the entire family. (Click the photos below for more detail)


----------------------------------------------------------------------------------------------------------------  

6/14/2011  

The newest, by JOSE CARMAZIO of Rio de Janeiro,  is a modified design of the Poke About.  His version seats two in tandem, and is used for fishing and hunting in the local waters of his home town. His ingenuity shows in all aspects of the build, yet it still looks like the Poke About. (click the photos below)

------------------------------------------------------------------------------------------------------------------------------------------------------------------------------------------------------------------ 

Submission Requirements: 
Articles not to exceed 1 page ( 8-1/2 x 11") of text in length (please don’t get too wordy)
Photos to be no larger than 640 x 480 resolution (uses less memory), 8 photos max.
Article description to be no more than 1 full line of text
Consent to post your location (City, State or Country)

Thank you,  Ken Simpson